
How To Take Professional Real Estate Pictures [Guest Post]
Why would you want to know how to take professional real estate pictures? Real estate is among the most competitive industries in the world and marketing and presentation of property is a huge key to setting yourself apart from the rest.
“In examining the sequence of each component of the Webpage that is viewed, we find
that the photo is overwhelmingly viewed first.” ~ Michael Seiler, founder and director of the Institute for Behavioral and Experimental Real Estate at Old Dominion University at Norfolk, Va.
In order to capture stunning photography you need to get set up with some basic gear and a lot of desire to develop a deep understanding of photography.
Camera Gear
Don’t get too caught up on buying the most expensive camera!
Virtually any SLR body will produce equally excellent results when used properly. A camera of exceptional ISO performance is good, but not required due to the fact that you will need to have a well-lit space to begin with. Higher end cameras will simply not be necessary; however, you will most certainly need an ultra wide zoom lens to capture smaller rooms and getting into tight corners.
Of course with great power comes great responsibility and you will want to be careful to watch for edge distortion as this can ruin a shot and will take a lot of effort in post-production to correct.
The image below shows how to properly handle edges with an ultra wide.
Note how, on the right side, the length of the couch is thrown into the edge so distortion is not noticable. If the corner of the couch was shown on the edge, the distortion would be obvious.
On the left side, half of an end table and picture is used and since you do not know the actual dimensions of the items, it really blends the distortion out to the point of being nearly unnoticeable.
Another dilemma you will encounter with an ultra wide angle lens is: balancing lines and angles.
There is no way around it, lines will be coming in from all directions.
Managing this is important and setting a base line may make other lines look out of control. I do the best I can, in camera and a tripod ball head, but I use the free rotation tool in Photoshop to fine tune the rotation on most shots.
There is really no exact science or way to do it except relying on your own judgment and understanding of balance, size relationships and good taste. Only use extreme ultra wide angles when necessary. – (The Art)
I shoot with a sigma 8-16mm but only use its extreme wide range when truly necessary.
This image below is also a good illustration of how a difficult lighting situation was handled using bracketed exposures and exposure fusion (HDR) technology.
Photomatix in this case with a 7 shot range at +/- 2/3 ev. – (The Science)

The Basics
With product photography for a professional environment I find myself balancing unique and creative shots with realism and professionalism. Keep in mind our end goal here is to create the most desirable view of the product for sale (the home).
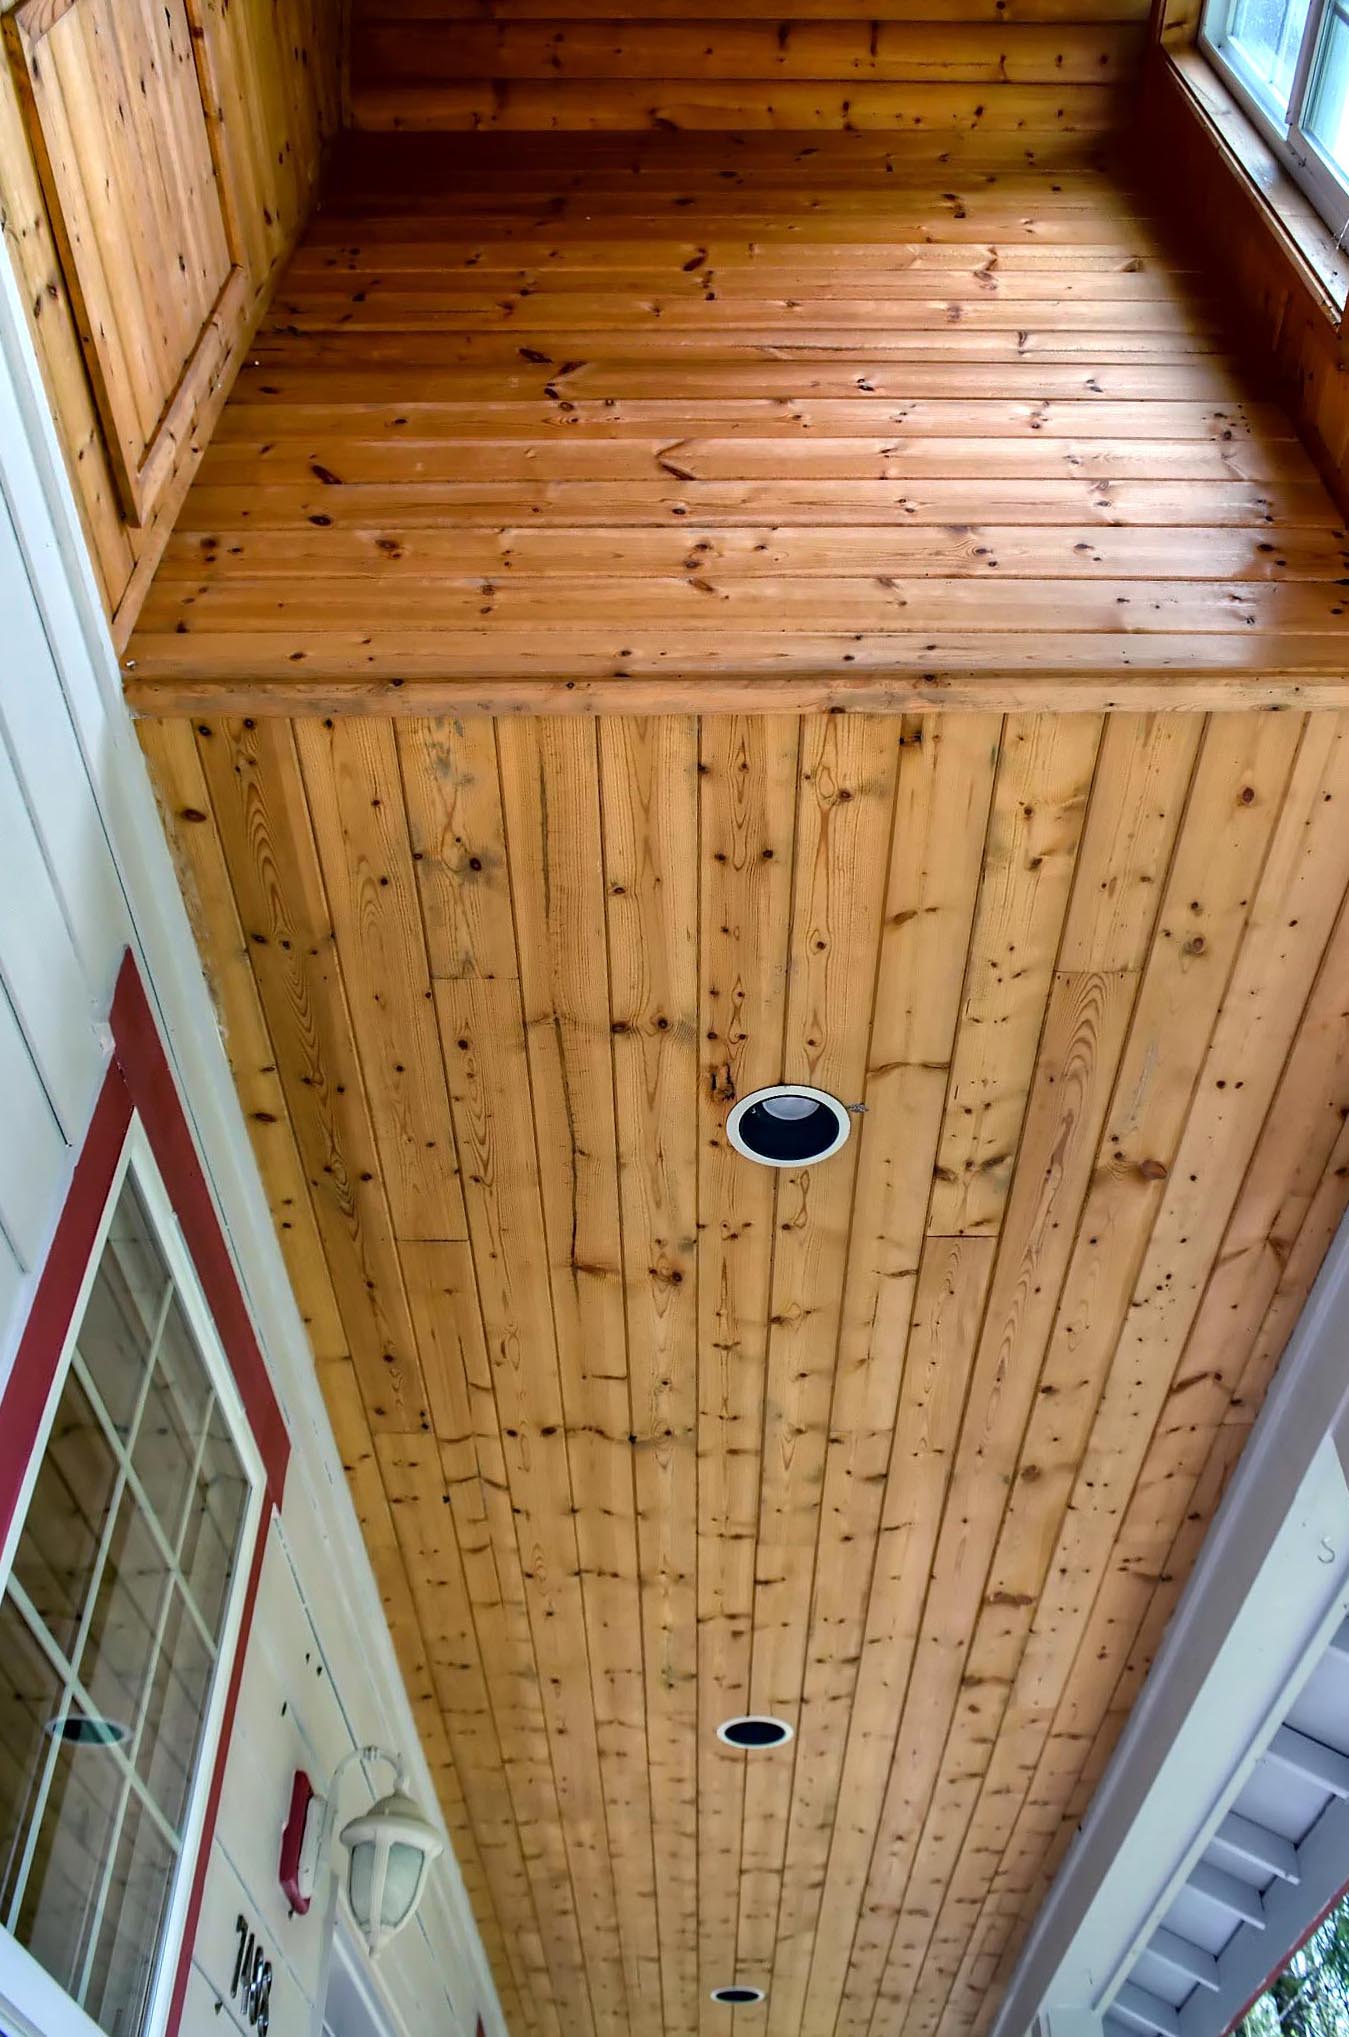
Remember to look high and low for shots that could be potential selling points. The following shot shows how I spotted a beautifully finished deck sky lighting ceiling.
You will want to pay attention to the basics of photography such as:
- Balance
- Framing
- Composition
You will be able to use these to turn your outdoor snapshots into photographs.
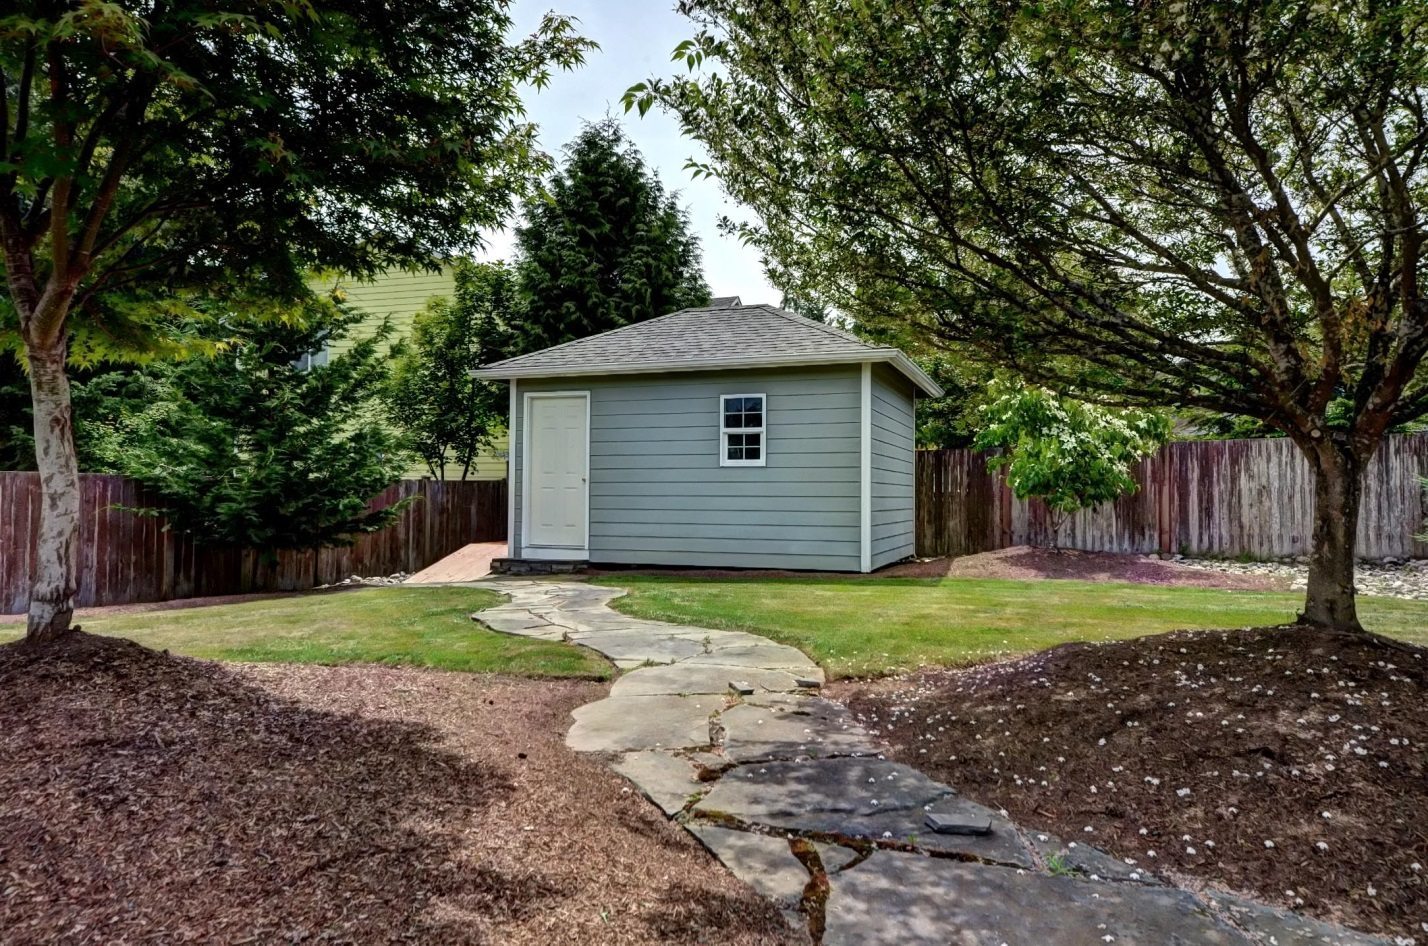
Here is an example of how framing a small shed between two trees and composing the line of the walkway to meander from the outside corner and into the center of the shot creates an immediate emotional connection with the property.
Lighting
Now for the most important aspect of real estate photography, Lighting!
Producing stunning shots in poorly lit rooms or rooms with evening sun blasting in the windows trying to blow out the shot (one of the greatest joys you will encounter).
In the shot below you will see how the 5pm direct summer sunlight was handled by filling the room with an off camera flash.
There are generally two schools of thought regarding lighting:
- Exposure fusion with natural lighting (dealing with light variations with HDR technology)
- Flash lighting which neutralizes the natural lighting conditions by replacing these elements with your artificial flash lighting
I personally use both methods depending on the situation. When I shoot a home and encounter a difficult lighting situation I actually use a bracketed set with natural light as well as a shot lit with flash. I would highly recommend doing this as your odds of missing a shot are very low.
AFTER:
The following shot shows how the camera organically deals with this lighting situation and leaves much to be desired. Also the lighting variations are so extreme that even with HDR, I could not get the full detail of the room to come out.
BEFORE:

Diffused Strobe Lighting
It is important to note that you will not get great results from flash photography in real estate until you master diffused strobe lighting.
You will need to experiment with variations that produce the softest results, otherwise you will get harsh hot spots from every angled smooth surface. The goal is to get every part of the room to be perfectly exposed and well lit, so bouncing light particles all over the place is the best way to do this.
Often great results can be had by bouncing light off walls and objects. I have had great results with most variations I have tried however I have found I save a lot of time using “a gradlon prodigy “. It’s really amazing how well this can soften up a room up.
Keep in mind there are as many variations of technique you can use to shoot a home as there are stars in the sky, so experiment with them and use what works best considering your desired time requirements and result quality. Good Luck!
Thank you Brandon Temple for your “How To Take Professional Real Estate Pictures” post!
If you would like to contact Branden for your Real Estate Images you can contact him below:
Guest Post By:
Brandon Temple
Architectural Exposure – Real Estate Photography
Seattle | Bellevue | Everett
p: 425.419.9426
e: [email protected]
Bio: I am a lifelong photographer and love everything about film and digital imagery. What makes photography really great to me is the blending of the technical-scientific aspect of the technology along with an artistic nature.


Thank you very much indeed – you literally saved me. I was going to invest into a very expensive camera. I was almost certain that the price makes all the difference. Your tips are true eye-openers for beginners like me (though I think this info would be useful for pros as well).
Can I share/use this info on my Real Estate website/Google+ and blog?
Sure John. Please make sure you add a link to the post. Have a great weekend.