
[fusion_builder_container type=”legacy” hundred_percent=”no” hundred_percent_height=”no” min_height_medium=”” min_height_small=”” min_height=”” hundred_percent_height_scroll=”no” align_content=”stretch” flex_align_items=”flex-start” flex_justify_content=”flex-start” flex_wrap_medium=”” flex_wrap_small=”” flex_wrap=”wrap” flex_column_spacing=”” hundred_percent_height_center_content=”yes” equal_height_columns=”no” container_tag=”div” menu_anchor=”” hide_on_mobile=”small-visibility,medium-visibility,large-visibility” status=”published” publish_date=”” class=”” id=”” margin_top_medium=”” margin_bottom_medium=”” margin_top_small=”” margin_bottom_small=”” margin_top=”” margin_bottom=”” padding_top_medium=”” padding_right_medium=”” padding_bottom_medium=”” padding_left_medium=”” padding_top_small=”” padding_right_small=”” padding_bottom_small=”” padding_left_small=”” padding_top=”” padding_right=”30″ padding_bottom=”30″ padding_left=”30″ link_hover_color=”” hue=”” saturation=”” lightness=”” alpha=”” link_color=”” border_sizes_top=”” border_sizes_right=”” border_sizes_bottom=”” border_sizes_left=”” border_color=”” border_style=”solid” border_radius_top_left=”” border_radius_top_right=”” border_radius_bottom_right=”” border_radius_bottom_left=”” box_shadow=”no” box_shadow_vertical=”” box_shadow_horizontal=”” box_shadow_blur=”0″ box_shadow_spread=”0″ box_shadow_color=”” box_shadow_style=”” z_index=”” overflow=”” background_color_medium=”” background_color_small=”” background_color=”” gradient_start_color=”” gradient_end_color=”” gradient_start_position=”0″ gradient_end_position=”100″ gradient_type=”linear” radial_direction=”center center” linear_angle=”180″ background_image_medium=”” background_image_small=”” background_image=”” skip_lazy_load=”” background_position_medium=”” background_position_small=”” background_position=”center center” background_repeat_medium=”” background_repeat_small=”” background_repeat=”no-repeat” background_size_medium=”” background_size_small=”” background_size=”” background_custom_size=”” background_custom_size_medium=”” background_custom_size_small=”” fade=”no” background_parallax=”none” enable_mobile=”no” parallax_speed=”0.3″ background_blend_mode_medium=”” background_blend_mode_small=”” background_blend_mode=”none” background_slider_images=”” background_slider_position=”” background_slider_skip_lazy_loading=”no” background_slider_loop=”yes” background_slider_pause_on_hover=”no” background_slider_slideshow_speed=”5000″ background_slider_animation=”fade” background_slider_direction=”up” background_slider_animation_speed=”800″ background_slider_blend_mode=”” video_mp4=”” video_webm=”” video_ogv=”” video_url=”” video_aspect_ratio=”16:9″ video_loop=”yes” video_mute=”yes” video_preview_image=”” pattern_bg=”none” pattern_custom_bg=”” pattern_bg_color=”” pattern_bg_style=”default” pattern_bg_opacity=”100″ pattern_bg_size=”” pattern_bg_blend_mode=”normal” mask_bg=”none” mask_custom_bg=”” mask_bg_color=”” mask_bg_accent_color=”” mask_bg_style=”default” mask_bg_opacity=”100″ mask_bg_transform=”left” mask_bg_blend_mode=”normal” render_logics=”” logics=”” absolute=”off” absolute_devices=”small,medium,large” sticky=”off” sticky_devices=”small-visibility,medium-visibility,large-visibility” sticky_background_color=”” sticky_height=”” sticky_offset=”” sticky_transition_offset=”0″ scroll_offset=”0″ animation_type=”” animation_direction=”left” animation_color=”” animation_speed=”0.3″ animation_delay=”0″ animation_offset=”” filter_hue=”0″ filter_saturation=”100″ filter_brightness=”100″ filter_contrast=”100″ filter_invert=”0″ filter_sepia=”0″ filter_opacity=”100″ filter_blur=”0″ filter_hue_hover=”0″ filter_saturation_hover=”100″ filter_brightness_hover=”100″ filter_contrast_hover=”100″ filter_invert_hover=”0″ filter_sepia_hover=”0″ filter_opacity_hover=”100″ filter_blur_hover=”0″][fusion_builder_row][fusion_builder_column type=”1_1″ layout=”1_1″ spacing=”” center_content=”no” link=”” target=”_self” min_height=”” hide_on_mobile=”small-visibility,medium-visibility,large-visibility” class=”” id=”” hover_type=”none” border_color=”” border_style=”solid” border_position=”all” border_radius=”” box_shadow=”no” dimension_box_shadow=”” box_shadow_blur=”0″ box_shadow_spread=”0″ box_shadow_color=”” box_shadow_style=”” padding_top=”” padding_right=”” padding_bottom=”” padding_left=”” margin_top=”” margin_bottom=”” background_type=”single” gradient_start_color=”” gradient_end_color=”” gradient_start_position=”0″ gradient_end_position=”100″ gradient_type=”linear” radial_direction=”center center” linear_angle=”180″ background_color=”” background_image=”” background_image_id=”” background_position=”left top” background_repeat=”no-repeat” background_blend_mode=”none” animation_type=”” animation_direction=”left” animation_speed=”0.3″ animation_offset=”” filter_type=”regular” filter_hue=”0″ filter_saturation=”100″ filter_brightness=”100″ filter_contrast=”100″ filter_invert=”0″ filter_sepia=”0″ filter_opacity=”100″ filter_blur=”0″ filter_hue_hover=”0″ filter_saturation_hover=”100″ filter_brightness_hover=”100″ filter_contrast_hover=”100″ filter_invert_hover=”0″ filter_sepia_hover=”0″ filter_opacity_hover=”100″ filter_blur_hover=”0″ last=”true” border_sizes_top=”0″ border_sizes_bottom=”0″ border_sizes_left=”0″ border_sizes_right=”0″ first=”true”][fusion_title title_type=”text” scroll_reveal_effect=”color_change” scroll_reveal_basis=”chars” scroll_reveal_behavior=”always” scroll_reveal_duration=”500″ scroll_reveal_stagger=”200″ scroll_reveal_delay=”0″ scroll_reveal_above_fold=”yes” marquee_direction=”left” marquee_mask_edges=”no” marquee_speed=”15000″ rotation_effect=”bounceIn” display_time=”1200″ highlight_effect=”circle” loop_animation=”once” highlight_animation_duration=”1500″ highlight_width=”9″ highlight_smudge_effect=”no” highlight_top_margin=”0″ before_text=”” rotation_text=”” highlight_text=”” after_text=”” awb-switch-editor-focus=”” title_link=”off” link_url=”” link_target=”_self” hide_on_mobile=”small-visibility,medium-visibility,large-visibility” sticky_display=”normal,sticky” class=”” id=”” content_align_medium=”” content_align_small=”” content_align=”left” size=”2″ animated_font_size=”” fusion_font_family_title_font=”” fusion_font_variant_title_font=”” font_size=”” line_height=”” letter_spacing=”” text_transform=”none” text_color=”” hue=”” saturation=”” lightness=”” alpha=”” animated_text_color=”” highlight_color=”” text_shadow=”no” text_shadow_vertical=”” text_shadow_horizontal=”” text_shadow_blur=”0″ text_shadow_color=”” text_stroke=”no” text_stroke_size=”1″ text_stroke_color=”” text_overflow=”none” margin_top_medium=”” margin_right_medium=”” margin_bottom_medium=”” margin_left_medium=”” margin_top_small=”” margin_right_small=”” margin_bottom_small=”” margin_left_small=”” margin_top=”” margin_right=”” margin_bottom=”30″ margin_left=”” margin_top_mobile=”” margin_bottom_mobile=”” gradient_font=”no” gradient_start_color=”” gradient_end_color=”” gradient_start_position=”0″ gradient_end_position=”100″ gradient_type=”linear” radial_direction=”center center” linear_angle=”180″ style_type=”default” sep_color=”” link_color=”” link_hover_color=”” animation_type=”” animation_direction=”left” animation_color=”” animation_speed=”0.3″ animation_delay=”0″ animation_offset=””]
Why a Real Estate Website Launch Checklist Matters
[/fusion_title][fusion_text columns=”” column_min_width=”” column_spacing=”” rule_style=”” rule_size=”” rule_color=”” hue=”” saturation=”” lightness=”” alpha=”” user_select=”” awb-switch-editor-focus=”” content_alignment_medium=”” content_alignment_small=”” content_alignment=”” hide_on_mobile=”small-visibility,medium-visibility,large-visibility” sticky_display=”normal,sticky” class=”” id=”” width_medium=”” width_small=”” width=”” min_width_medium=”” min_width_small=”” min_width=”” max_width_medium=”” max_width_small=”” max_width=”” margin_top=”” margin_right=”” margin_bottom=”” margin_left=”” fusion_font_family_text_font=”” fusion_font_variant_text_font=”” font_size=”22px” line_height=”” letter_spacing=”” text_transform=”” text_color=”” animation_type=”” animation_direction=”left” animation_color=”” animation_speed=”0.3″ animation_delay=”0″ animation_offset=”” logics=””]
Ready to ‘Go Live’ With Your New Real Estate Website? We’ve Got You Covered with Our Complete Launch Checklist. That’s Everything from Testing, to WordPress, and Content.
-Updated for 2025
[/fusion_text][fusion_text columns=”” column_min_width=”” column_spacing=”” rule_style=”” rule_size=”” rule_color=”” hue=”” saturation=”” lightness=”” alpha=”” user_select=”” awb-switch-editor-focus=”” content_alignment_medium=”” content_alignment_small=”” content_alignment=”” hide_on_mobile=”small-visibility,medium-visibility,large-visibility” sticky_display=”normal,sticky” class=”” id=”” width_medium=”” width_small=”” width=”” min_width_medium=”” min_width_small=”” min_width=”” max_width_medium=”” max_width_small=”” max_width=”” margin_top=”” margin_right=”” margin_bottom=”” margin_left=”” fusion_font_family_text_font=”” fusion_font_variant_text_font=”” font_size=”” line_height=”” letter_spacing=”” text_transform=”” text_color=”” animation_type=”” animation_direction=”left” animation_color=”” animation_speed=”0.3″ animation_delay=”0″ animation_offset=”” logics=””]
You’ve put a lot of time into developing your new real estate website and now you are ready to launch. Or are you? Launching your new site isn’t as simple as pushing a button, there are a lot of things to check first. We’ve put it all together in one convenient list so you can be sure you aren’t missing a thing.
In this list we go over the three basic parts of lunching your site, each with their own checklist. In part 1, we focus on testing to make sure your site is functioning as expected. For part 2 we go over the WordPress checklist to make sure you have everything set up correctly. Part 3 covers content. A successful real estate website needs a polished image and comes with certain requirements.
[/fusion_text][/fusion_builder_column][/fusion_builder_row][/fusion_builder_container][fusion_builder_container type=”legacy” hundred_percent=”no” hundred_percent_height=”no” min_height_medium=”” min_height_small=”” min_height=”” hundred_percent_height_scroll=”no” align_content=”stretch” flex_align_items=”flex-start” flex_justify_content=”flex-start” flex_wrap_medium=”” flex_wrap_small=”” flex_wrap=”wrap” flex_column_spacing=”” hundred_percent_height_center_content=”yes” equal_height_columns=”no” container_tag=”div” menu_anchor=”” hide_on_mobile=”small-visibility,medium-visibility,large-visibility” status=”published” publish_date=”” class=”” id=”” margin_top_medium=”” margin_bottom_medium=”” margin_top_small=”” margin_bottom_small=”” margin_top=”” margin_bottom=”” padding_top_medium=”” padding_right_medium=”” padding_bottom_medium=”” padding_left_medium=”” padding_top_small=”” padding_right_small=”” padding_bottom_small=”” padding_left_small=”” padding_top=”40px” padding_right=”40px” padding_bottom=”40px” padding_left=”40px” link_hover_color=”” hue=”” saturation=”” lightness=”” alpha=”” link_color=”var(–awb-custom_color_1)” border_sizes_top=”” border_sizes_right=”” border_sizes_bottom=”” border_sizes_left=”” border_color=”” border_style=”solid” border_radius_top_left=”” border_radius_top_right=”” border_radius_bottom_right=”” border_radius_bottom_left=”” box_shadow=”no” box_shadow_vertical=”” box_shadow_horizontal=”” box_shadow_blur=”0″ box_shadow_spread=”0″ box_shadow_color=”” box_shadow_style=”” z_index=”” overflow=”” background_color_medium=”” background_color_small=”” background_color=”var(–awb-color2)” gradient_start_color=”” gradient_end_color=”” gradient_start_position=”0″ gradient_end_position=”100″ gradient_type=”linear” radial_direction=”center center” linear_angle=”180″ background_image_medium=”” background_image_small=”” background_image=”” skip_lazy_load=”” background_position_medium=”” background_position_small=”” background_position=”center center” background_repeat_medium=”” background_repeat_small=”” background_repeat=”no-repeat” background_size_medium=”” background_size_small=”” background_size=”” background_custom_size=”” background_custom_size_medium=”” background_custom_size_small=”” fade=”no” background_parallax=”none” enable_mobile=”no” parallax_speed=”0.3″ background_blend_mode_medium=”” background_blend_mode_small=”” background_blend_mode=”none” background_slider_images=”” background_slider_position=”” background_slider_skip_lazy_loading=”no” background_slider_loop=”yes” background_slider_pause_on_hover=”no” background_slider_slideshow_speed=”5000″ background_slider_animation=”fade” background_slider_direction=”up” background_slider_animation_speed=”800″ background_slider_blend_mode=”” video_mp4=”” video_webm=”” video_ogv=”” video_url=”” video_aspect_ratio=”16:9″ video_loop=”yes” video_mute=”yes” video_preview_image=”” pattern_bg=”none” pattern_custom_bg=”” pattern_bg_color=”” pattern_bg_style=”default” pattern_bg_opacity=”100″ pattern_bg_size=”” pattern_bg_blend_mode=”normal” mask_bg=”none” mask_custom_bg=”” mask_bg_color=”” mask_bg_accent_color=”” mask_bg_style=”default” mask_bg_opacity=”100″ mask_bg_transform=”left” mask_bg_blend_mode=”normal” render_logics=”” logics=”” absolute=”off” absolute_devices=”small,medium,large” sticky=”off” sticky_devices=”small-visibility,medium-visibility,large-visibility” sticky_background_color=”” sticky_height=”” sticky_offset=”” sticky_transition_offset=”0″ scroll_offset=”0″ animation_type=”” animation_direction=”left” animation_color=”” animation_speed=”0.3″ animation_delay=”0″ animation_offset=”” filter_hue=”0″ filter_saturation=”100″ filter_brightness=”100″ filter_contrast=”100″ filter_invert=”0″ filter_sepia=”0″ filter_opacity=”100″ filter_blur=”0″ filter_hue_hover=”0″ filter_saturation_hover=”100″ filter_brightness_hover=”100″ filter_contrast_hover=”100″ filter_invert_hover=”0″ filter_sepia_hover=”0″ filter_opacity_hover=”100″ filter_blur_hover=”0″][fusion_builder_row][fusion_builder_column type=”1_1″ layout=”1_1″ align_self=”auto” content_layout=”column” align_content=”center” valign_content=”flex-start” content_wrap=”wrap” spacing=”” center_content=”yes” column_tag=”div” link=”” target=”_self” link_description=”” min_height=”” hide_on_mobile=”small-visibility,medium-visibility,large-visibility” sticky_display=”normal,sticky” class=”” id=”” type_medium=”” type_small=”” flex_grow_medium=”” flex_grow_small=”” flex_grow=”” flex_shrink_medium=”” flex_shrink_small=”” flex_shrink=”” order_medium=”0″ order_small=”0″ spacing_left_medium=”” spacing_right_medium=”” spacing_left_small=”” spacing_right_small=”” spacing_left=”” spacing_right=”” margin_top_medium=”” margin_bottom_medium=”” margin_top_small=”” margin_bottom_small=”” margin_top=”” margin_bottom=”” padding_top_medium=”” padding_right_medium=”” padding_bottom_medium=”” padding_left_medium=”” padding_top_small=”” padding_right_small=”” padding_bottom_small=”” padding_left_small=”” padding_top=”” padding_right=”” padding_bottom=”” padding_left=”” hover_type=”none” border_sizes_top=”0″ border_sizes_right=”0″ border_sizes_bottom=”0″ border_sizes_left=”0″ border_color_hover=”” hue=”” saturation=”” lightness=”” alpha=”” border_color=”” border_style=”solid” border_radius_top_left=”” border_radius_top_right=”” border_radius_bottom_right=”” border_radius_bottom_left=”” box_shadow=”no” box_shadow_vertical=”” box_shadow_horizontal=”” box_shadow_blur=”0″ box_shadow_spread=”0″ box_shadow_color=”” box_shadow_style=”” z_index_hover=”” z_index=”” overflow=”” background_type=”single” background_color_medium=”” background_color_small=”” background_color_medium_hover=”” background_color_small_hover=”” background_color_hover=”” background_color=”” gradient_start_color=”” gradient_end_color=”” gradient_start_position=”0″ gradient_end_position=”100″ gradient_type=”linear” radial_direction=”center center” linear_angle=”180″ background_image_medium=”” background_image_small=”” background_image=”” background_image_id_medium=”” background_image_id_small=”” background_image_id=”” lazy_load=”none” skip_lazy_load=”” background_position_medium=”” background_position_small=”” background_position=”left top” background_repeat_medium=”” background_repeat_small=”” background_repeat=”no-repeat” background_size_medium=”” background_size_small=”” background_size=”” background_custom_size=”” background_custom_size_medium=”” background_custom_size_small=”” background_blend_mode_medium=”” background_blend_mode_small=”” background_blend_mode=”none” background_slider_images=”” background_slider_position=”” background_slider_skip_lazy_loading=”no” background_slider_loop=”yes” background_slider_pause_on_hover=”no” background_slider_slideshow_speed=”5000″ background_slider_animation=”fade” background_slider_direction=”up” background_slider_animation_speed=”800″ background_slider_blend_mode=”” render_logics=”” sticky=”off” sticky_devices=”small-visibility,medium-visibility,large-visibility” sticky_offset=”” absolute=”off” absolute_top=”” absolute_right=”” absolute_bottom=”” absolute_left=”” filter_type=”regular” filter_hover_element=”self” filter_hue_hover=”0″ filter_saturation_hover=”100″ filter_brightness_hover=”100″ filter_contrast_hover=”100″ filter_invert_hover=”0″ filter_sepia_hover=”0″ filter_opacity_hover=”100″ filter_blur_hover=”0″ filter_hue=”0″ filter_saturation=”100″ filter_brightness=”100″ filter_contrast=”100″ filter_invert=”0″ filter_sepia=”0″ filter_opacity=”100″ filter_blur=”0″ transform_type=”regular” transform_hover_element=”self” transform_scale_x_hover=”1″ transform_scale_y_hover=”1″ transform_translate_x_hover=”0″ transform_translate_y_hover=”0″ transform_rotate_hover=”0″ transform_skew_x_hover=”0″ transform_skew_y_hover=”0″ transform_scale_x=”1″ transform_scale_y=”1″ transform_translate_x=”0″ transform_translate_y=”0″ transform_rotate=”0″ transform_skew_x=”0″ transform_skew_y=”0″ transform_origin=”” transition_duration=”300″ transition_easing=”ease” transition_custom_easing=”” motion_effects=”W10=” scroll_motion_devices=”small-visibility,medium-visibility,large-visibility” animation_type=”” animation_direction=”left” animation_color=”” animation_speed=”0.3″ animation_delay=”0″ animation_offset=”” last=”true” border_position=”all” first=”true”][fusion_title title_type=”text” scroll_reveal_effect=”color_change” scroll_reveal_basis=”chars” scroll_reveal_behavior=”always” scroll_reveal_duration=”500″ scroll_reveal_stagger=”200″ scroll_reveal_delay=”0″ scroll_reveal_above_fold=”yes” marquee_direction=”left” marquee_mask_edges=”no” marquee_speed=”15000″ rotation_effect=”bounceIn” display_time=”1200″ highlight_effect=”circle” loop_animation=”once” highlight_animation_duration=”1500″ highlight_width=”9″ highlight_smudge_effect=”no” highlight_top_margin=”0″ before_text=”” rotation_text=”” highlight_text=”” after_text=”” awb-switch-editor-focus=”” title_link=”off” link_url=”” link_target=”_self” hide_on_mobile=”small-visibility,medium-visibility,large-visibility” sticky_display=”normal,sticky” class=”” id=”” content_align_medium=”” content_align_small=”” content_align=”left” size=”2″ animated_font_size=”” fusion_font_family_title_font=”” fusion_font_variant_title_font=”” font_size=”” line_height=”” letter_spacing=”” text_transform=”” text_color=”” hue=”” saturation=”” lightness=”” alpha=”” animated_text_color=”” highlight_color=”” text_shadow=”no” text_shadow_vertical=”” text_shadow_horizontal=”” text_shadow_blur=”0″ text_shadow_color=”” text_stroke=”no” text_stroke_size=”1″ text_stroke_color=”” text_overflow=”none” margin_top_medium=”” margin_right_medium=”” margin_bottom_medium=”” margin_left_medium=”” margin_top_small=”” margin_right_small=”” margin_bottom_small=”” margin_left_small=”” margin_top=”” margin_right=”” margin_bottom=”30″ margin_left=”” margin_top_mobile=”” margin_bottom_mobile=”” gradient_font=”no” gradient_start_color=”” gradient_end_color=”” gradient_start_position=”0″ gradient_end_position=”100″ gradient_type=”linear” radial_direction=”center center” linear_angle=”180″ style_type=”default” sep_color=”” link_color=”” link_hover_color=”” animation_type=”” animation_direction=”left” animation_color=”” animation_speed=”0.3″ animation_delay=”0″ animation_offset=””]
Quick Navigation: Jump to a Checklist Section
[/fusion_title][fusion_checklist type=”icons” icon=”fa-angle-down fas” iconcolor=”var(–awb-custom_color_1)” hue=”” saturation=”” lightness=”” alpha=”” circle=”no” circlecolor=”#002244″ textcolor=”” size=”” item_padding_top=”” item_padding_right=”” item_padding_bottom=”” item_padding_left=”” divider=”” divider_color=”” odd_row_bgcolor=”” even_row_bgcolor=”” margin_top=”” margin_right=”” margin_bottom=”” margin_left=”” hide_on_mobile=”small-visibility,medium-visibility,large-visibility” class=”” id=”” parent_dynamic_content=””][fusion_li_item icon=”” awb-switch-editor-focus=”” iconcolor=”” hue=”” saturation=”” lightness=”” alpha=”” circlecolor=””]
[/fusion_li_item][fusion_li_item icon=”” awb-switch-editor-focus=”” iconcolor=”” hue=”” saturation=”” lightness=”” alpha=”” circlecolor=””]
[/fusion_li_item][fusion_li_item icon=”” awb-switch-editor-focus=”” iconcolor=”” hue=”” saturation=”” lightness=”” alpha=”” circlecolor=””]
[/fusion_li_item][fusion_li_item icon=”” awb-switch-editor-focus=”” iconcolor=”” hue=”” saturation=”” lightness=”” alpha=”” circlecolor=””]
[/fusion_li_item][fusion_li_item icon=”” awb-switch-editor-focus=”” iconcolor=”” hue=”” saturation=”” lightness=”” alpha=”” circlecolor=””]
[/fusion_li_item][/fusion_checklist][/fusion_builder_column][/fusion_builder_row][/fusion_builder_container][fusion_builder_container admin_label=”TESTING Checklist” type=”legacy” hundred_percent=”no” hundred_percent_height=”no” min_height_medium=”” min_height_small=”” min_height=”” hundred_percent_height_scroll=”no” align_content=”stretch” flex_align_items=”flex-start” flex_justify_content=”flex-start” flex_wrap_medium=”” flex_wrap_small=”” flex_wrap=”wrap” flex_column_spacing=”” hundred_percent_height_center_content=”yes” equal_height_columns=”no” container_tag=”div” menu_anchor=”testing” hide_on_mobile=”small-visibility,medium-visibility,large-visibility” status=”published” publish_date=”” class=”” id=”” margin_top_medium=”” margin_bottom_medium=”” margin_top_small=”” margin_bottom_small=”” margin_top=”” margin_bottom=”” padding_top_medium=”” padding_right_medium=”” padding_bottom_medium=”” padding_left_medium=”” padding_top_small=”” padding_right_small=”” padding_bottom_small=”” padding_left_small=”” padding_top=”60″ padding_right=”30px” padding_bottom=”60″ padding_left=”30px” link_hover_color=”” hue=”” saturation=”” lightness=”” alpha=”” link_color=”” border_sizes_top=”” border_sizes_right=”” border_sizes_bottom=”” border_sizes_left=”” border_color=”” border_style=”solid” border_radius_top_left=”” border_radius_top_right=”” border_radius_bottom_right=”” border_radius_bottom_left=”” box_shadow=”no” box_shadow_vertical=”” box_shadow_horizontal=”” box_shadow_blur=”0″ box_shadow_spread=”0″ box_shadow_color=”” box_shadow_style=”” z_index=”” overflow=”” background_color_medium=”” background_color_small=”” background_color=”” gradient_start_color=”” gradient_end_color=”” gradient_start_position=”0″ gradient_end_position=”100″ gradient_type=”linear” radial_direction=”center center” linear_angle=”180″ background_image_medium=”” background_image_small=”” background_image=”” skip_lazy_load=”” background_position_medium=”” background_position_small=”” background_position=”center center” background_repeat_medium=”” background_repeat_small=”” background_repeat=”no-repeat” background_size_medium=”” background_size_small=”” background_size=”” background_custom_size=”” background_custom_size_medium=”” background_custom_size_small=”” fade=”no” background_parallax=”none” enable_mobile=”no” parallax_speed=”0.3″ background_blend_mode_medium=”” background_blend_mode_small=”” background_blend_mode=”none” background_slider_images=”” background_slider_position=”” background_slider_skip_lazy_loading=”no” background_slider_loop=”yes” background_slider_pause_on_hover=”no” background_slider_slideshow_speed=”5000″ background_slider_animation=”fade” background_slider_direction=”up” background_slider_animation_speed=”800″ background_slider_blend_mode=”” video_mp4=”” video_webm=”” video_ogv=”” video_url=”” video_aspect_ratio=”16:9″ video_loop=”yes” video_mute=”yes” video_preview_image=”” pattern_bg=”none” pattern_custom_bg=”” pattern_bg_color=”” pattern_bg_style=”default” pattern_bg_opacity=”100″ pattern_bg_size=”” pattern_bg_blend_mode=”normal” mask_bg=”none” mask_custom_bg=”” mask_bg_color=”” mask_bg_accent_color=”” mask_bg_style=”default” mask_bg_opacity=”100″ mask_bg_transform=”left” mask_bg_blend_mode=”normal” render_logics=”” logics=”” absolute=”off” absolute_devices=”small,medium,large” sticky=”off” sticky_devices=”small-visibility,medium-visibility,large-visibility” sticky_background_color=”” sticky_height=”” sticky_offset=”” sticky_transition_offset=”0″ scroll_offset=”0″ animation_type=”” animation_direction=”left” animation_color=”” animation_speed=”0.3″ animation_delay=”0″ animation_offset=”” filter_hue=”0″ filter_saturation=”100″ filter_brightness=”100″ filter_contrast=”100″ filter_invert=”0″ filter_sepia=”0″ filter_opacity=”100″ filter_blur=”0″ filter_hue_hover=”0″ filter_saturation_hover=”100″ filter_brightness_hover=”100″ filter_contrast_hover=”100″ filter_invert_hover=”0″ filter_sepia_hover=”0″ filter_opacity_hover=”100″ filter_blur_hover=”0″][fusion_builder_row][fusion_builder_column type=”1_1″ layout=”1_1″ spacing=”” center_content=”no” link=”” target=”_self” min_height=”” hide_on_mobile=”small-visibility,medium-visibility,large-visibility” class=”” id=”” hover_type=”none” border_color=”” border_style=”solid” border_position=”all” border_radius=”” box_shadow=”no” dimension_box_shadow=”” box_shadow_blur=”0″ box_shadow_spread=”0″ box_shadow_color=”” box_shadow_style=”” padding_top=”” padding_right=”” padding_bottom=”” padding_left=”” margin_top=”” margin_bottom=”” background_type=”single” gradient_start_color=”” gradient_end_color=”” gradient_start_position=”0″ gradient_end_position=”100″ gradient_type=”linear” radial_direction=”center center” linear_angle=”180″ background_color=”” background_image=”” background_image_id=”” background_position=”left top” background_repeat=”no-repeat” background_blend_mode=”none” animation_type=”” animation_direction=”left” animation_speed=”0.3″ animation_offset=”” filter_type=”regular” filter_hue=”0″ filter_saturation=”100″ filter_brightness=”100″ filter_contrast=”100″ filter_invert=”0″ filter_sepia=”0″ filter_opacity=”100″ filter_blur=”0″ filter_hue_hover=”0″ filter_saturation_hover=”100″ filter_brightness_hover=”100″ filter_contrast_hover=”100″ filter_invert_hover=”0″ filter_sepia_hover=”0″ filter_opacity_hover=”100″ filter_blur_hover=”0″ last=”true” border_sizes_top=”0″ border_sizes_bottom=”0″ border_sizes_left=”0″ border_sizes_right=”0″ first=”true”][fusion_imageframe image_id=”66483|full” aspect_ratio=”” custom_aspect_ratio=”100″ aspect_ratio_position=”” skip_lazy_load=”” lightbox=”no” gallery_id=”” lightbox_image=”” lightbox_image_id=”” alt=”” link=”” linktarget=”_self” hide_on_mobile=”small-visibility,medium-visibility,large-visibility” sticky_display=”normal,sticky” class=”” id=”” max_width=”” sticky_max_width=”” align_medium=”none” align_small=”none” align=”none” mask=”” custom_mask=”” mask_size=”” mask_custom_size=”” mask_position=”” mask_custom_position=”” mask_repeat=”” style_type=”” blur=”” stylecolor=”” hue=”” saturation=”” lightness=”” alpha=”” hover_type=”none” magnify_full_img=”” magnify_duration=”120″ scroll_height=”100″ scroll_speed=”1″ margin_top_medium=”” margin_right_medium=”” margin_bottom_medium=”” margin_left_medium=”” margin_top_small=”” margin_right_small=”” margin_bottom_small=”” margin_left_small=”” margin_top=”” margin_right=”” margin_bottom=”20px” margin_left=”” bordersize=”” bordercolor=”” borderradius=”” z_index=”” caption_style=”off” caption_align_medium=”none” caption_align_small=”none” caption_align=”none” caption_title=”” caption_text=”” caption_title_tag=”2″ fusion_font_family_caption_title_font=”” fusion_font_variant_caption_title_font=”” caption_title_size=”” caption_title_line_height=”” caption_title_letter_spacing=”” caption_title_transform=”” caption_title_color=”” caption_background_color=”” fusion_font_family_caption_text_font=”” fusion_font_variant_caption_text_font=”” caption_text_size=”” caption_text_line_height=”” caption_text_letter_spacing=”” caption_text_transform=”” caption_text_color=”” caption_border_color=”” caption_overlay_color=”” caption_margin_top=”” caption_margin_right=”” caption_margin_bottom=”” caption_margin_left=”” animation_type=”” animation_direction=”left” animation_color=”” animation_speed=”0.3″ animation_delay=”0″ animation_offset=”” filter_hue=”0″ filter_saturation=”100″ filter_brightness=”100″ filter_contrast=”100″ filter_invert=”0″ filter_sepia=”0″ filter_opacity=”100″ filter_blur=”0″ filter_hue_hover=”0″ filter_saturation_hover=”100″ filter_brightness_hover=”100″ filter_contrast_hover=”100″ filter_invert_hover=”0″ filter_sepia_hover=”0″ filter_opacity_hover=”100″ filter_blur_hover=”0″]https://www.jasonfox.me/wp-content/uploads/2022/05/Green-Ocean-Real-Estate-Services-Website-1.webp[/fusion_imageframe][fusion_title title_type=”text” scroll_reveal_effect=”color_change” scroll_reveal_basis=”chars” scroll_reveal_behavior=”always” scroll_reveal_duration=”500″ scroll_reveal_stagger=”200″ scroll_reveal_delay=”0″ scroll_reveal_above_fold=”yes” marquee_direction=”left” marquee_mask_edges=”no” marquee_speed=”15000″ rotation_effect=”bounceIn” display_time=”1200″ highlight_effect=”circle” loop_animation=”once” highlight_animation_duration=”1500″ highlight_width=”9″ highlight_smudge_effect=”no” highlight_top_margin=”0″ before_text=”” rotation_text=”” highlight_text=”” after_text=”” awb-switch-editor-focus=”” title_link=”off” link_url=”” link_target=”_self” hide_on_mobile=”small-visibility,medium-visibility,large-visibility” sticky_display=”normal,sticky” class=”” id=”” content_align_medium=”” content_align_small=”” content_align=”left” size=”2″ animated_font_size=”” fusion_font_family_title_font=”” fusion_font_variant_title_font=”” font_size=”” line_height=”” letter_spacing=”” text_transform=”” text_color=”” hue=”” saturation=”” lightness=”” alpha=”” animated_text_color=”” highlight_color=”” text_shadow=”no” text_shadow_vertical=”” text_shadow_horizontal=”” text_shadow_blur=”0″ text_shadow_color=”” text_stroke=”no” text_stroke_size=”1″ text_stroke_color=”” text_overflow=”none” margin_top_medium=”” margin_right_medium=”” margin_bottom_medium=”” margin_left_medium=”” margin_top_small=”” margin_right_small=”” margin_bottom_small=”” margin_left_small=”” margin_top=”” margin_right=”” margin_bottom=”30″ margin_left=”” margin_top_mobile=”” margin_bottom_mobile=”” gradient_font=”no” gradient_start_color=”” gradient_end_color=”” gradient_start_position=”0″ gradient_end_position=”100″ gradient_type=”linear” radial_direction=”center center” linear_angle=”180″ style_type=”default” sep_color=”” link_color=”” link_hover_color=”” animation_type=”” animation_direction=”left” animation_color=”” animation_speed=”0.3″ animation_delay=”0″ animation_offset=””]
Real Estate Website Pre-Launch Testing Checklist
[/fusion_title][fusion_text columns=”” column_min_width=”” column_spacing=”” rule_style=”” rule_size=”” rule_color=”” hue=”” saturation=”” lightness=”” alpha=”” user_select=”” awb-switch-editor-focus=”” content_alignment_medium=”” content_alignment_small=”” content_alignment=”” hide_on_mobile=”small-visibility,medium-visibility,large-visibility” sticky_display=”normal,sticky” class=”” id=”” width_medium=”” width_small=”” width=”” min_width_medium=”” min_width_small=”” min_width=”” max_width_medium=”” max_width_small=”” max_width=”” margin_top=”” margin_right=”” margin_bottom=”” margin_left=”” fusion_font_family_text_font=”” fusion_font_variant_text_font=”” font_size=”” line_height=”” letter_spacing=”” text_transform=”” text_color=”” animation_type=”” animation_direction=”left” animation_color=”” animation_speed=”0.3″ animation_delay=”0″ animation_offset=”” logics=””]
It’s important to make sure your site is functioning as expected. Site speed, technical errors, dead links, and a poor user experience can all affect your site bounce rate.
Check for Content Errors and Placeholder Text
Make a pass over the entire site. Be on the lookout for spelling errors and temporary or placeholder text. I often use Lorum Ispum text when during the initial design phase.
Pro Tip: There are plenty of great tools to help check your spelling. There is a Chrome plugin called Webpage Spell-Check, and a website called Online-Spellcheck.com.
Optimize Website Images for Speed
Let’s make those images pop without slowing things down. Implement AI-powered image optimization tools like ShortPixel, Smush or Imagify. It’s like giving your website a nitro boost, where images are tailored to fit the viewer’s device, slashing load times and smoothing out their browsing experience. No more waiting around for photos to load, just swift, seamless viewing that keeps potential buyers glued to the screen.
Pro Tip: Convert any PNG files to JPG or WebP. They are smaller file sizes and there is no noticeable difference in quality.
Pro Tip: Use Keep your image optimization between 75% and 90% for best results. Complex images with a lot of colors and details will typically be a larger files size and can be difficult to reduce to a reasonable size.
Test Website Page Speed and Load Time
The top three tools for checking your site speed are GTmetrix, Pingdom, and GoogleSpeed Insights. Site speed is important for a lot of reasons including SEO.
Pro Tip: The tools are great indicators of performance and offer helpful suggestions for speeding up your site. Be careful not to obsess over speed scores, the tools are meant to help find trouble spots.
Review User Experience and Navigation
Real estate agents want leads and a good site is built with lead generation in mind. However, if your site is cluttered with CTA’s, sign up forms, links, and other lead generation clutter it can look chaotic. Your customer is there because of a perceived value, so give it to them. Off real content and a smooth clean experience with clear navigation.
Verify Internal and External Links
Make a quick pass of the links to make sure everything works as expected. Or, use a tool to check it for you.
Perform Cross-Browser Compatibility Testing
Make sure the pages display correctly across different browsers. There are a lot of browsers so I would suggest focusing on the ones that have the highest market share.
Pro Tip: No need to test a browser that only has 0.93% of the market share, stick with the top three or four. Currently the top three are Chrome for Android, Chrome 8.5, and Safari for iPhone.
Ensure Mobile Responsiveness
This one is crucial, it is estimates that 76% of home buyers shop for their new house using a mobile device.
Pro-Tip: Chrome has a built in option to check the mobile view. Just open the user console and you’ll see an option at the top to view the browser in mobile view. You can also select devices to emulate from Settings.
Test Contact and Inquiry Forms
Test the forms to make sure they are sending and receiving correctly.
Pro Tip: Use a test account to check the forms and keep the testing isolated from the live email accounts.
[/fusion_text][/fusion_builder_column][/fusion_builder_row][/fusion_builder_container][fusion_builder_container admin_label=”WORDPRESS” type=”legacy” hundred_percent=”no” hundred_percent_height=”no” min_height_medium=”” min_height_small=”” min_height=”” hundred_percent_height_scroll=”no” align_content=”stretch” flex_align_items=”flex-start” flex_justify_content=”flex-start” flex_wrap_medium=”” flex_wrap_small=”” flex_wrap=”wrap” flex_column_spacing=”” hundred_percent_height_center_content=”yes” equal_height_columns=”no” container_tag=”div” menu_anchor=”wp” hide_on_mobile=”small-visibility,medium-visibility,large-visibility” status=”published” publish_date=”” class=”” id=”” margin_top_medium=”” margin_bottom_medium=”” margin_top_small=”” margin_bottom_small=”” margin_top=”” margin_bottom=”” padding_top_medium=”” padding_right_medium=”” padding_bottom_medium=”” padding_left_medium=”” padding_top_small=”” padding_right_small=”” padding_bottom_small=”” padding_left_small=”” padding_top=”60″ padding_right=”30px” padding_bottom=”60″ padding_left=”30px” link_hover_color=”” hue=”” saturation=”” lightness=”” alpha=”” link_color=”” border_sizes_top=”” border_sizes_right=”” border_sizes_bottom=”” border_sizes_left=”” border_color=”” border_style=”solid” border_radius_top_left=”” border_radius_top_right=”” border_radius_bottom_right=”” border_radius_bottom_left=”” box_shadow=”no” box_shadow_vertical=”” box_shadow_horizontal=”” box_shadow_blur=”0″ box_shadow_spread=”0″ box_shadow_color=”” box_shadow_style=”” z_index=”” overflow=”” background_color_medium=”” background_color_small=”” background_color=”var(–awb-color2)” gradient_start_color=”” gradient_end_color=”” gradient_start_position=”0″ gradient_end_position=”100″ gradient_type=”linear” radial_direction=”center center” linear_angle=”180″ background_image_medium=”” background_image_small=”” background_image=”” skip_lazy_load=”” background_position_medium=”” background_position_small=”” background_position=”center center” background_repeat_medium=”” background_repeat_small=”” background_repeat=”no-repeat” background_size_medium=”” background_size_small=”” background_size=”” background_custom_size=”” background_custom_size_medium=”” background_custom_size_small=”” fade=”no” background_parallax=”none” enable_mobile=”no” parallax_speed=”0.3″ background_blend_mode_medium=”” background_blend_mode_small=”” background_blend_mode=”none” background_slider_images=”” background_slider_position=”” background_slider_skip_lazy_loading=”no” background_slider_loop=”yes” background_slider_pause_on_hover=”no” background_slider_slideshow_speed=”5000″ background_slider_animation=”fade” background_slider_direction=”up” background_slider_animation_speed=”800″ background_slider_blend_mode=”” video_mp4=”” video_webm=”” video_ogv=”” video_url=”” video_aspect_ratio=”16:9″ video_loop=”yes” video_mute=”yes” video_preview_image=”” pattern_bg=”none” pattern_custom_bg=”” pattern_bg_color=”” pattern_bg_style=”default” pattern_bg_opacity=”100″ pattern_bg_size=”” pattern_bg_blend_mode=”normal” mask_bg=”none” mask_custom_bg=”” mask_bg_color=”” mask_bg_accent_color=”” mask_bg_style=”default” mask_bg_opacity=”100″ mask_bg_transform=”left” mask_bg_blend_mode=”normal” render_logics=”” logics=”” absolute=”off” absolute_devices=”small,medium,large” sticky=”off” sticky_devices=”small-visibility,medium-visibility,large-visibility” sticky_background_color=”” sticky_height=”” sticky_offset=”” sticky_transition_offset=”0″ scroll_offset=”0″ animation_type=”” animation_direction=”left” animation_color=”” animation_speed=”0.3″ animation_delay=”0″ animation_offset=”” filter_hue=”0″ filter_saturation=”100″ filter_brightness=”100″ filter_contrast=”100″ filter_invert=”0″ filter_sepia=”0″ filter_opacity=”100″ filter_blur=”0″ filter_hue_hover=”0″ filter_saturation_hover=”100″ filter_brightness_hover=”100″ filter_contrast_hover=”100″ filter_invert_hover=”0″ filter_sepia_hover=”0″ filter_opacity_hover=”100″ filter_blur_hover=”0″][fusion_builder_row][fusion_builder_column type=”1_1″ layout=”1_1″ spacing=”” center_content=”no” link=”” target=”_self” min_height=”” hide_on_mobile=”small-visibility,medium-visibility,large-visibility” class=”” id=”” hover_type=”none” border_color=”” border_style=”solid” border_position=”all” border_radius=”” box_shadow=”no” dimension_box_shadow=”” box_shadow_blur=”0″ box_shadow_spread=”0″ box_shadow_color=”” box_shadow_style=”” padding_top=”” padding_right=”” padding_bottom=”” padding_left=”” margin_top=”” margin_bottom=”” background_type=”single” gradient_start_color=”” gradient_end_color=”” gradient_start_position=”0″ gradient_end_position=”100″ gradient_type=”linear” radial_direction=”center center” linear_angle=”180″ background_color=”” background_image=”” background_image_id=”” background_position=”left top” background_repeat=”no-repeat” background_blend_mode=”none” animation_type=”” animation_direction=”left” animation_speed=”0.3″ animation_offset=”” filter_type=”regular” filter_hue=”0″ filter_saturation=”100″ filter_brightness=”100″ filter_contrast=”100″ filter_invert=”0″ filter_sepia=”0″ filter_opacity=”100″ filter_blur=”0″ filter_hue_hover=”0″ filter_saturation_hover=”100″ filter_brightness_hover=”100″ filter_contrast_hover=”100″ filter_invert_hover=”0″ filter_sepia_hover=”0″ filter_opacity_hover=”100″ filter_blur_hover=”0″ last=”true” border_sizes_top=”0″ border_sizes_bottom=”0″ border_sizes_left=”0″ border_sizes_right=”0″ first=”true”][fusion_imageframe image_id=”66485|full” aspect_ratio=”” custom_aspect_ratio=”100″ aspect_ratio_position=”” skip_lazy_load=”” lightbox=”no” gallery_id=”” lightbox_image=”” lightbox_image_id=”” alt=”” link=”” linktarget=”_self” hide_on_mobile=”small-visibility,medium-visibility,large-visibility” sticky_display=”normal,sticky” class=”” id=”” max_width=”” sticky_max_width=”” align_medium=”none” align_small=”none” align=”none” mask=”” custom_mask=”” mask_size=”” mask_custom_size=”” mask_position=”” mask_custom_position=”” mask_repeat=”” style_type=”” blur=”” stylecolor=”” hue=”” saturation=”” lightness=”” alpha=”” hover_type=”none” magnify_full_img=”” magnify_duration=”120″ scroll_height=”100″ scroll_speed=”1″ margin_top_medium=”” margin_right_medium=”” margin_bottom_medium=”” margin_left_medium=”” margin_top_small=”” margin_right_small=”” margin_bottom_small=”” margin_left_small=”” margin_top=”” margin_right=”” margin_bottom=”20px” margin_left=”” bordersize=”” bordercolor=”” borderradius=”” z_index=”” caption_style=”off” caption_align_medium=”none” caption_align_small=”none” caption_align=”none” caption_title=”” caption_text=”” caption_title_tag=”2″ fusion_font_family_caption_title_font=”” fusion_font_variant_caption_title_font=”” caption_title_size=”” caption_title_line_height=”” caption_title_letter_spacing=”” caption_title_transform=”” caption_title_color=”” caption_background_color=”” fusion_font_family_caption_text_font=”” fusion_font_variant_caption_text_font=”” caption_text_size=”” caption_text_line_height=”” caption_text_letter_spacing=”” caption_text_transform=”” caption_text_color=”” caption_border_color=”” caption_overlay_color=”” caption_margin_top=”” caption_margin_right=”” caption_margin_bottom=”” caption_margin_left=”” animation_type=”” animation_direction=”left” animation_color=”” animation_speed=”0.3″ animation_delay=”0″ animation_offset=”” filter_hue=”0″ filter_saturation=”100″ filter_brightness=”100″ filter_contrast=”100″ filter_invert=”0″ filter_sepia=”0″ filter_opacity=”100″ filter_blur=”0″ filter_hue_hover=”0″ filter_saturation_hover=”100″ filter_brightness_hover=”100″ filter_contrast_hover=”100″ filter_invert_hover=”0″ filter_sepia_hover=”0″ filter_opacity_hover=”100″ filter_blur_hover=”0″]https://www.jasonfox.me/wp-content/uploads/2022/05/Agent-showing-his-Wordpress-Real-estate-website.webp[/fusion_imageframe][fusion_title title_type=”text” scroll_reveal_effect=”color_change” scroll_reveal_basis=”chars” scroll_reveal_behavior=”always” scroll_reveal_duration=”500″ scroll_reveal_stagger=”200″ scroll_reveal_delay=”0″ scroll_reveal_above_fold=”yes” marquee_direction=”left” marquee_mask_edges=”no” marquee_speed=”15000″ rotation_effect=”bounceIn” display_time=”1200″ highlight_effect=”circle” loop_animation=”once” highlight_animation_duration=”1500″ highlight_width=”9″ highlight_smudge_effect=”no” highlight_top_margin=”0″ before_text=”” rotation_text=”” highlight_text=”” after_text=”” awb-switch-editor-focus=”” title_link=”off” link_url=”” link_target=”_self” hide_on_mobile=”small-visibility,medium-visibility,large-visibility” sticky_display=”normal,sticky” class=”” id=”” content_align_medium=”” content_align_small=”” content_align=”left” size=”2″ animated_font_size=”” fusion_font_family_title_font=”” fusion_font_variant_title_font=”” font_size=”” line_height=”” letter_spacing=”” text_transform=”” text_color=”” hue=”” saturation=”” lightness=”” alpha=”” animated_text_color=”” highlight_color=”” text_shadow=”no” text_shadow_vertical=”” text_shadow_horizontal=”” text_shadow_blur=”0″ text_shadow_color=”” text_stroke=”no” text_stroke_size=”1″ text_stroke_color=”” text_overflow=”none” margin_top_medium=”” margin_right_medium=”” margin_bottom_medium=”” margin_left_medium=”” margin_top_small=”” margin_right_small=”” margin_bottom_small=”” margin_left_small=”” margin_top=”” margin_right=”” margin_bottom=”30″ margin_left=”” margin_top_mobile=”” margin_bottom_mobile=”” gradient_font=”no” gradient_start_color=”” gradient_end_color=”” gradient_start_position=”0″ gradient_end_position=”100″ gradient_type=”linear” radial_direction=”center center” linear_angle=”180″ style_type=”default” sep_color=”” link_color=”” link_hover_color=”” animation_type=”” animation_direction=”left” animation_color=”” animation_speed=”0.3″ animation_delay=”0″ animation_offset=””]
WordPress Setup Checklist for Real Estate Websites
[/fusion_title][fusion_text columns=”” column_min_width=”” column_spacing=”” rule_style=”” rule_size=”” rule_color=”” hue=”” saturation=”” lightness=”” alpha=”” user_select=”” awb-switch-editor-focus=”” content_alignment_medium=”” content_alignment_small=”” content_alignment=”” hide_on_mobile=”small-visibility,medium-visibility,large-visibility” sticky_display=”normal,sticky” class=”” id=”” width_medium=”” width_small=”” width=”” min_width_medium=”” min_width_small=”” min_width=”” max_width_medium=”” max_width_small=”” max_width=”” margin_top=”” margin_right=”” margin_bottom=”” margin_left=”” fusion_font_family_text_font=”” fusion_font_variant_text_font=”” font_size=”” line_height=”” letter_spacing=”” text_transform=”” text_color=”” animation_type=”” animation_direction=”left” animation_color=”” animation_speed=”0.3″ animation_delay=”0″ animation_offset=”” logics=””]
WordPress is a remarkable tool with lots of options to help with design, SEO, performance, security, etc. You don’t need most of these features at a deep level but you should have a basic understanding of what they do.
In this list we cover all of the WordPress features you need to know to get your real estate website ready to launch.
Install and Configure SEO Plugins (Yoast, RankMath, etc.)
Make sure the Yoast SEO Plugin is installed and setup. The pages should have a unique title, meta description, and keywords.
Now, let’s give your content that extra edge. Incorporate AI-based SEO tools like HubSpots Breeze. These aren’t your everyday tools; they harness AI to dive deep into your content, making sure it speaks the language of both your audience and search engines. They’ll sift through your words, suggest enhancements, and ensure every page and post is primed to rank. Think of them as your SEO coaches, guiding your content to the top of the search results.
Set Up Logical Permalinks
Make sure the permalinks are configured in a way that is logical to visitors and benefit Google indexing.
Remove Unused Plugins, Themes, and Tools
Make a pass through your plugins and theme builder tools to see if there are any unnecessary or redundant items. If you’ve installed any plugins to test out and don’t end of using them make sure they get deleted. The same goes for extra themes. Not only do they take up unnecessary space they will require updating regularly, even if they are inactive.
Secure Your Website with AI-Based Plugins
But let’s not stop there. It’s time to bolster your site’s defenses. Enhance your website’s security by integrating AI-driven security plugins such as Wordfence or Sucuri. These aren’t your run-of-the-mill security solutions; they’re powered by machine learning, constantly evolving to outsmart the latest threats. They’re like having a digital security guard that never sleeps, always there to protect your real estate haven from unwanted intruders.
Pro Tip: It’s a good idea to keep a spare inactive theme like ‘Twenty Twenty-Four‘ installed in case you need to deactivate your theme for any reason.
Pro Tip: Some premium themes like Avada and Divi come with lots of great design tools built in. Many of these tools never get used and can potentially affect your site speed. Fortunately you can remove them. Check the list when you are done and take out anything not being used. Avada even comes with a nifty Performance Wizard that walks you through the process in minutes.
Clean Up Drafts, Revisions, and Media Library
- Remove unused posts, and pages: This includes drafts or pages in the trash folder.
- Remove unused images: Scan you media library for duplicate or unused images.
- Remove revisions: Revisions are autosaved by WordPress during development and can potentially slow down your site. The easiest way to clean these up is to use a plugin like WP-Sweep.
Set Your Website Timezone
Make sure the time-zone is set correctly for scheduling updates. Go to Settings > General and look for the Timezone dropdown menu.
Create a Custom 404 Page
Add a custom 404 page that will redirect users back to your site should they encounter a broken link. Without it the visitor encounters a dead end and they leave your site.
Set Up 301 Redirects
Clean up any page redirections and avoid 404 errors. If you are rebuilding or making significant changes to a site you may need to include a plugin to manage the 301 redirects. A great option for this is a plugin simply called ‘Redirection‘. It’s easy to use and you’ll have it all set up in no time.
Install and Test Google Analytics
If you have Google analytics installed make sure it’s configured correctly and analyzing traffic.
Configure Backup Plan
Make sure a backup is installed. The better hosts, like WP Engine, include daily backups as part of their service. You can also include backup your site with a utility like Updraft WordPress Backup Plugin.
Configure Caching Plugins
We like WP Rocket, it’s super easy to set up and will get your site humming. Check the cache options, file optimization, LazyLoad, and preloading. Make sure your site still looks the way you expect. Using LazyLoad and minifying CSS or JavaScript file in particular can cause problems on the front end.
Pro Tip: Some website hosts, like Siteground, have built in site caching plugins as part of their service. Make sure you don’t have similar plugins that may cause a conflict.
Pro Tip: Use a CDN like Cloudflare. What is a CDN? A CDN, or Content Delivery Network is a geographically distributed network of servers used to distribute a websites images locally, reducing load time. Cloudflare is a popular service with a great free account option that will work fine for most real estate agents. Many premium caching plugins like WP Rocket automatically configure with Cloudflare.
Secure Your Site
Website hosts all provide some level of security built in but you can always get more. Top security plugins for 2025 include Cloudflare, Sucuri, MalCare and Wordfence.
Spam
You can limit spam by disabling comments, or using the moderate option. With the moderate option you will need to approve any comments before they show up on your site, This is a great way to interact with your customers as well as keep the annoying bots out. Also, be on the lookout for pingbacks and trackbacks. Use a plugin like Askimet to control the spam.
Pro Tip: When moderating comments look for the following: embedded links – in the comment section or the URL field – linking to a suspicious source, the use of keywords in place of a name, broadly worded comments that could apply to any post, and foreign language characters.
SSL certificate
This is included with all the better hosing services. SSL stands for Secure Layer Socket certificate and it’s used to show your site is secure. The bigger browsers like Chrome will flag you if you don’t have it. If it is included with your hosting service it’s easy to install with the help of Really Simple SSL . If you need help just contact your host.
PRO Tip: If your hosting service charges extra for this certificate you may want to reconsider who you are using since it’s pretty much standard these days.
Turn On Search Engine Indexing
This should have been turned off while in development. When you are ready to go live go to your WordPress dashboard and select Settings > Reading, check ‘Search Engine Visibility’, and Save Changes.
Create and Submit a Sitemap
A sitemap provides information about the pages, images, , videos, and other files on your website to search engine crawlers. It gives them a ‘map’ of your site allowing for better site indexing and better SEO. It helps search engines like Google understand you so users can find you. In short, it helps your site get discovered.
WordPress automatically creates a sitemap but you should always check it for unwanted pages. Plugins like Yoast SEO will also do the job for you.
Optimize Your robots.txt File
Google checks your sitemap the first time it gets discovered, and again if notified of a change. The robots.txt file specifies the location of the sitemap. Example: ‘Sitemap: http://example.com/sitemap_location.xml‘.
Update the Admin Email Address
This is the email used to notify the site administrator of anything going on with the site. It is only necessary to change the email if the person developing the site is different that the person who will be managing it.
Double-Check IDX Integration and API Keys
Depending on the service you are using you may have an API key. Double check and make sure the correct API key is being used. If you have wrapper pages make sure they are showing the correct header/footer design.
Pro Tip: Double check the background cron to see what intervals it is set for. The ‘cron’ is a software utility schedules intervals for a task, in this case, your real estate listings. Choose an interval that works for you, I usually go with a short interval like three minutes. If for some reason you find this slows your site down you can bump the number a little higher.
Pro Tip: Sometime there are conflicts between IDX services that use wrapper pages and caching plugins. IDX Broker has a great wrapper page option but using a cache plugin can cause problems. For example; If you notice the listings aren’t showing up in the wrapper page simply disable caching for the wrapper page. Caching plugins like WP Rocket offer this option on every page.
Pro Tip: If you are using IDX Broker you should consider creating a CNAME record to point your subdomain address to. IDX Broker lets you customize your subdomain address and it’s easy to do, plus it has added SEO value. Check out our complete guide to ordering and optimizing IDX Broker and adding custom subdomain names.
[/fusion_text][/fusion_builder_column][/fusion_builder_row][/fusion_builder_container][fusion_builder_container admin_label=”CONTENT” type=”legacy” hundred_percent=”no” hundred_percent_height=”no” min_height_medium=”” min_height_small=”” min_height=”” hundred_percent_height_scroll=”no” align_content=”stretch” flex_align_items=”flex-start” flex_justify_content=”flex-start” flex_wrap_medium=”” flex_wrap_small=”” flex_wrap=”wrap” flex_column_spacing=”” hundred_percent_height_center_content=”yes” equal_height_columns=”no” container_tag=”div” menu_anchor=”ct” hide_on_mobile=”small-visibility,medium-visibility,large-visibility” status=”published” publish_date=”” class=”” id=”” margin_top_medium=”” margin_bottom_medium=”” margin_top_small=”” margin_bottom_small=”” margin_top=”” margin_bottom=”” padding_top_medium=”” padding_right_medium=”” padding_bottom_medium=”” padding_left_medium=”” padding_top_small=”” padding_right_small=”” padding_bottom_small=”” padding_left_small=”” padding_top=”60″ padding_right=”30″ padding_bottom=”60″ padding_left=”30″ link_hover_color=”” hue=”” saturation=”” lightness=”” alpha=”” link_color=”” border_sizes_top=”” border_sizes_right=”” border_sizes_bottom=”” border_sizes_left=”” border_color=”” border_style=”solid” border_radius_top_left=”” border_radius_top_right=”” border_radius_bottom_right=”” border_radius_bottom_left=”” box_shadow=”no” box_shadow_vertical=”” box_shadow_horizontal=”” box_shadow_blur=”0″ box_shadow_spread=”0″ box_shadow_color=”” box_shadow_style=”” z_index=”” overflow=”” background_color_medium=”” background_color_small=”” background_color=”” gradient_start_color=”” gradient_end_color=”” gradient_start_position=”0″ gradient_end_position=”100″ gradient_type=”linear” radial_direction=”center center” linear_angle=”180″ background_image_medium=”” background_image_small=”” background_image=”” skip_lazy_load=”” background_position_medium=”” background_position_small=”” background_position=”center center” background_repeat_medium=”” background_repeat_small=”” background_repeat=”no-repeat” background_size_medium=”” background_size_small=”” background_size=”” background_custom_size=”” background_custom_size_medium=”” background_custom_size_small=”” fade=”no” background_parallax=”none” enable_mobile=”no” parallax_speed=”0.3″ background_blend_mode_medium=”” background_blend_mode_small=”” background_blend_mode=”none” background_slider_images=”” background_slider_position=”” background_slider_skip_lazy_loading=”no” background_slider_loop=”yes” background_slider_pause_on_hover=”no” background_slider_slideshow_speed=”5000″ background_slider_animation=”fade” background_slider_direction=”up” background_slider_animation_speed=”800″ background_slider_blend_mode=”” video_mp4=”” video_webm=”” video_ogv=”” video_url=”” video_aspect_ratio=”16:9″ video_loop=”yes” video_mute=”yes” video_preview_image=”” pattern_bg=”none” pattern_custom_bg=”” pattern_bg_color=”” pattern_bg_style=”default” pattern_bg_opacity=”100″ pattern_bg_size=”” pattern_bg_blend_mode=”normal” mask_bg=”none” mask_custom_bg=”” mask_bg_color=”” mask_bg_accent_color=”” mask_bg_style=”default” mask_bg_opacity=”100″ mask_bg_transform=”left” mask_bg_blend_mode=”normal” render_logics=”” logics=”” absolute=”off” absolute_devices=”small,medium,large” sticky=”off” sticky_devices=”small-visibility,medium-visibility,large-visibility” sticky_background_color=”” sticky_height=”” sticky_offset=”” sticky_transition_offset=”0″ scroll_offset=”0″ animation_type=”” animation_direction=”left” animation_color=”” animation_speed=”0.3″ animation_delay=”0″ animation_offset=”” filter_hue=”0″ filter_saturation=”100″ filter_brightness=”100″ filter_contrast=”100″ filter_invert=”0″ filter_sepia=”0″ filter_opacity=”100″ filter_blur=”0″ filter_hue_hover=”0″ filter_saturation_hover=”100″ filter_brightness_hover=”100″ filter_contrast_hover=”100″ filter_invert_hover=”0″ filter_sepia_hover=”0″ filter_opacity_hover=”100″ filter_blur_hover=”0″][fusion_builder_row][fusion_builder_column type=”1_1″ layout=”1_1″ spacing=”” center_content=”no” link=”” target=”_self” min_height=”” hide_on_mobile=”small-visibility,medium-visibility,large-visibility” class=”” id=”” hover_type=”none” border_color=”” border_style=”solid” border_position=”all” border_radius=”” box_shadow=”no” dimension_box_shadow=”” box_shadow_blur=”0″ box_shadow_spread=”0″ box_shadow_color=”” box_shadow_style=”” padding_top=”” padding_right=”” padding_bottom=”” padding_left=”” margin_top=”” margin_bottom=”” background_type=”single” gradient_start_color=”” gradient_end_color=”” gradient_start_position=”0″ gradient_end_position=”100″ gradient_type=”linear” radial_direction=”center center” linear_angle=”180″ background_color=”” background_image=”” background_image_id=”” background_position=”left top” background_repeat=”no-repeat” background_blend_mode=”none” animation_type=”” animation_direction=”left” animation_speed=”0.3″ animation_offset=”” filter_type=”regular” filter_hue=”0″ filter_saturation=”100″ filter_brightness=”100″ filter_contrast=”100″ filter_invert=”0″ filter_sepia=”0″ filter_opacity=”100″ filter_blur=”0″ filter_hue_hover=”0″ filter_saturation_hover=”100″ filter_brightness_hover=”100″ filter_contrast_hover=”100″ filter_invert_hover=”0″ filter_sepia_hover=”0″ filter_opacity_hover=”100″ filter_blur_hover=”0″ last=”true” border_sizes_top=”0″ border_sizes_bottom=”0″ border_sizes_left=”0″ border_sizes_right=”0″ first=”true”][fusion_imageframe image_id=”66286|full” aspect_ratio=”” custom_aspect_ratio=”100″ aspect_ratio_position=”” skip_lazy_load=”” lightbox=”no” gallery_id=”” lightbox_image=”” lightbox_image_id=”” alt=”” link=”” linktarget=”_self” hide_on_mobile=”small-visibility,medium-visibility,large-visibility” sticky_display=”normal,sticky” class=”” id=”” max_width=”” sticky_max_width=”” align_medium=”none” align_small=”none” align=”none” mask=”” custom_mask=”” mask_size=”” mask_custom_size=”” mask_position=”” mask_custom_position=”” mask_repeat=”” style_type=”” blur=”” stylecolor=”” hue=”” saturation=”” lightness=”” alpha=”” hover_type=”none” magnify_full_img=”” magnify_duration=”120″ scroll_height=”100″ scroll_speed=”1″ margin_top_medium=”” margin_right_medium=”” margin_bottom_medium=”” margin_left_medium=”” margin_top_small=”” margin_right_small=”” margin_bottom_small=”” margin_left_small=”” margin_top=”” margin_right=”” margin_bottom=”20px” margin_left=”” bordersize=”” bordercolor=”” borderradius=”” z_index=”” caption_style=”off” caption_align_medium=”none” caption_align_small=”none” caption_align=”none” caption_title=”” caption_text=”” caption_title_tag=”2″ fusion_font_family_caption_title_font=”” fusion_font_variant_caption_title_font=”” caption_title_size=”” caption_title_line_height=”” caption_title_letter_spacing=”” caption_title_transform=”” caption_title_color=”” caption_background_color=”” fusion_font_family_caption_text_font=”” fusion_font_variant_caption_text_font=”” caption_text_size=”” caption_text_line_height=”” caption_text_letter_spacing=”” caption_text_transform=”” caption_text_color=”” caption_border_color=”” caption_overlay_color=”” caption_margin_top=”” caption_margin_right=”” caption_margin_bottom=”” caption_margin_left=”” animation_type=”” animation_direction=”left” animation_color=”” animation_speed=”0.3″ animation_delay=”0″ animation_offset=”” filter_hue=”0″ filter_saturation=”100″ filter_brightness=”100″ filter_contrast=”100″ filter_invert=”0″ filter_sepia=”0″ filter_opacity=”100″ filter_blur=”0″ filter_hue_hover=”0″ filter_saturation_hover=”100″ filter_brightness_hover=”100″ filter_contrast_hover=”100″ filter_invert_hover=”0″ filter_sepia_hover=”0″ filter_opacity_hover=”100″ filter_blur_hover=”0″]https://www.jasonfox.me/wp-content/uploads/2024/12/0761ed3b-5de3-4015-8f77-d5d969726d9b.webp[/fusion_imageframe][fusion_title title_type=”text” scroll_reveal_effect=”color_change” scroll_reveal_basis=”chars” scroll_reveal_behavior=”always” scroll_reveal_duration=”500″ scroll_reveal_stagger=”200″ scroll_reveal_delay=”0″ scroll_reveal_above_fold=”yes” marquee_direction=”left” marquee_mask_edges=”no” marquee_speed=”15000″ rotation_effect=”bounceIn” display_time=”1200″ highlight_effect=”circle” loop_animation=”once” highlight_animation_duration=”1500″ highlight_width=”9″ highlight_smudge_effect=”no” highlight_top_margin=”0″ before_text=”” rotation_text=”” highlight_text=”” after_text=”” awb-switch-editor-focus=”” title_link=”off” link_url=”” link_target=”_self” hide_on_mobile=”small-visibility,medium-visibility,large-visibility” sticky_display=”normal,sticky” class=”” id=”” content_align_medium=”” content_align_small=”” content_align=”left” size=”2″ animated_font_size=”” fusion_font_family_title_font=”” fusion_font_variant_title_font=”” font_size=”” line_height=”” letter_spacing=”” text_transform=”” text_color=”” hue=”” saturation=”” lightness=”” alpha=”” animated_text_color=”” highlight_color=”” text_shadow=”no” text_shadow_vertical=”” text_shadow_horizontal=”” text_shadow_blur=”0″ text_shadow_color=”” text_stroke=”no” text_stroke_size=”1″ text_stroke_color=”” text_overflow=”none” margin_top_medium=”” margin_right_medium=”” margin_bottom_medium=”” margin_left_medium=”” margin_top_small=”” margin_right_small=”” margin_bottom_small=”” margin_left_small=”” margin_top=”” margin_right=”” margin_bottom=”30″ margin_left=”” margin_top_mobile=”” margin_bottom_mobile=”” gradient_font=”no” gradient_start_color=”” gradient_end_color=”” gradient_start_position=”0″ gradient_end_position=”100″ gradient_type=”linear” radial_direction=”center center” linear_angle=”180″ style_type=”default” sep_color=”” link_color=”” link_hover_color=”” animation_type=”” animation_direction=”left” animation_color=”” animation_speed=”0.3″ animation_delay=”0″ animation_offset=””]
Real Estate Website Content Checklist
[/fusion_title][fusion_text columns=”” column_min_width=”” column_spacing=”” rule_style=”” rule_size=”” rule_color=”” hue=”” saturation=”” lightness=”” alpha=”” user_select=”” awb-switch-editor-focus=”” content_alignment_medium=”” content_alignment_small=”” content_alignment=”” hide_on_mobile=”small-visibility,medium-visibility,large-visibility” sticky_display=”normal,sticky” class=”” id=”” width_medium=”” width_small=”” width=”” min_width_medium=”” min_width_small=”” min_width=”” max_width_medium=”” max_width_small=”” max_width=”” margin_top=”” margin_right=”” margin_bottom=”” margin_left=”” fusion_font_family_text_font=”” fusion_font_variant_text_font=”” font_size=”” line_height=”” letter_spacing=”” text_transform=”” text_color=”” animation_type=”” animation_direction=”left” animation_color=”” animation_speed=”0.3″ animation_delay=”0″ animation_offset=”” logics=””]
Depending on your region, MLS, or Broker there may be specific requirements for your site. If you are developing a single agent or team site you may be subject to your Brokers requirements. Commercial and residential sites may have different disclaimers. Always check with your broker or MLS first.
The following list of items are all visible on your websites front end.
But first, let’s talk content. Want to keep your site’s content as fresh as your listings? Utilize AI-driven content creation tools like Jasper or Writesonic. Picture this: engaging property descriptions and compelling blog posts that practically write themselves, all while keeping SEO in mind. These tools are like having a digital wordsmith at your fingertips, helping you churn out high-quality content that captures attention and keeps your audience coming back for more.
Evaluate Calls-to-Action (CTAs)
Make sure there are enough CTA’s throughout the site to encourage users to sign up but not so much that they get discouraged and leave.
Pro Tip: Visitors are on your site because of it’s perceived value. There in nothing wrong with asking them to contact you but don’t make it the focus of the site. Give them something of value first, then encourage a response.
Verify Logo and Favicon Placement
Make sure the correct logo images are used throughout the site. Adding a favicon is a nice touch as well. A favicon is little icon displayed in the browser tab. It’s typically designed to look like a simplified version of your logo.
Optimize Website Images for Retina and Performance
Now, let’s make those images pop without slowing things down. Implement image optimization tools like Smush, ShortPixel or Imagify. It’s like giving your website a nitro boost, where images are tailored to fit the viewer’s device, cutting load times and smoothing out their browsing experience. No more waiting around for photos to load, just swift, seamless viewing that keeps potential buyers glued to the screen.
Pro Tip: For sharper visuals on high-resolution displays, upload Retina versions of your logo—usually double the original size. Most WordPress themes support this feature. If your logo is in SVG format, you’re already covered (SVGs scale cleanly and don’t need Retina versions).
Pro Tip: Always convert PNGs to JPG or WebP when possible. WebP is especially efficient—it delivers high-quality images at a significantly smaller file size and is supported by all modern browsers. Smaller images mean faster page loads, which improves both user experience and SEO.
Pro Tip: Aim to compress images between 75% and 90% for the best balance of quality and speed. Keep in mind that images with lots of detail or color may require slightly larger file sizes.
Confirm Social Media Links and Share Functionality
Check to make sure the social follow links available on the site and go to the correct accounts. Make sure Social share links are available on relevant pages and articles you want people to share.
Pro Tip: Plugins like Social Warfare are convenient especially if you want to add sharing links sitewide.
Pro Tip: Use Social Share images. Without them sharing your page on social media will look pretty dull. Yoast has it built in.
Include Required Legal Notices and Broker Disclaimers
Depending on your region, MLS, or Broker, you may need to include a disclaimer , terms and conditions, or privacy policy. Some other examples of legal items you may be required to include: DCMA (Digital Millennium Copyright Act Notice), CBRE (Coldwell Banker Richard Ellis), Equal Housing Opportunity logo, Realtor logo.
These are usually added to the footer. Look familiar? ![]()
![]()
Other Broker details
If you are affiliated with a broker make sure all broker specific references are in place. Some brokers require their logo to be a specific size when paired with your own. They may also require certain colors be featured prominently as well as reference pages. Check with your managing broker for details.
Ensure IDX Listings Display Properly
Check any pages where IDX listings are active. Make sure they are displaying the correct listings.
Pro Tip: If you are using a service like our favorite, IDX Broker, the wrapper pages and map pins won’t display until the site goes live.
[/fusion_text][/fusion_builder_column][/fusion_builder_row][/fusion_builder_container][fusion_builder_container admin_label=”Summary” type=”legacy” hundred_percent=”no” hundred_percent_height=”no” min_height_medium=”” min_height_small=”” min_height=”” hundred_percent_height_scroll=”no” align_content=”stretch” flex_align_items=”flex-start” flex_justify_content=”flex-start” flex_wrap_medium=”” flex_wrap_small=”” flex_wrap=”wrap” flex_column_spacing=”” hundred_percent_height_center_content=”yes” equal_height_columns=”no” container_tag=”div” menu_anchor=”fs” hide_on_mobile=”small-visibility,medium-visibility,large-visibility” status=”published” publish_date=”” class=”” id=”” margin_top_medium=”” margin_bottom_medium=”” margin_top_small=”” margin_bottom_small=”” margin_top=”” margin_bottom=”” padding_top_medium=”” padding_right_medium=”” padding_bottom_medium=”” padding_left_medium=”” padding_top_small=”” padding_right_small=”” padding_bottom_small=”” padding_left_small=”” padding_top=”60″ padding_right=”30″ padding_bottom=”60″ padding_left=”30″ link_hover_color=”” hue=”” saturation=”” lightness=”” alpha=”” link_color=”” border_sizes_top=”” border_sizes_right=”” border_sizes_bottom=”” border_sizes_left=”” border_color=”” border_style=”solid” border_radius_top_left=”” border_radius_top_right=”” border_radius_bottom_right=”” border_radius_bottom_left=”” box_shadow=”no” box_shadow_vertical=”” box_shadow_horizontal=”” box_shadow_blur=”0″ box_shadow_spread=”0″ box_shadow_color=”” box_shadow_style=”” z_index=”” overflow=”” background_color_medium=”” background_color_small=”” background_color=”var(–awb-color2)” gradient_start_color=”” gradient_end_color=”” gradient_start_position=”0″ gradient_end_position=”100″ gradient_type=”linear” radial_direction=”center center” linear_angle=”180″ background_image_medium=”” background_image_small=”” background_image=”” skip_lazy_load=”” background_position_medium=”” background_position_small=”” background_position=”center center” background_repeat_medium=”” background_repeat_small=”” background_repeat=”no-repeat” background_size_medium=”” background_size_small=”” background_size=”” background_custom_size=”” background_custom_size_medium=”” background_custom_size_small=”” fade=”no” background_parallax=”none” enable_mobile=”no” parallax_speed=”0.3″ background_blend_mode_medium=”” background_blend_mode_small=”” background_blend_mode=”none” background_slider_images=”” background_slider_position=”” background_slider_skip_lazy_loading=”no” background_slider_loop=”yes” background_slider_pause_on_hover=”no” background_slider_slideshow_speed=”5000″ background_slider_animation=”fade” background_slider_direction=”up” background_slider_animation_speed=”800″ background_slider_blend_mode=”” video_mp4=”” video_webm=”” video_ogv=”” video_url=”” video_aspect_ratio=”16:9″ video_loop=”yes” video_mute=”yes” video_preview_image=”” pattern_bg=”none” pattern_custom_bg=”” pattern_bg_color=”” pattern_bg_style=”default” pattern_bg_opacity=”100″ pattern_bg_size=”” pattern_bg_blend_mode=”normal” mask_bg=”none” mask_custom_bg=”” mask_bg_color=”” mask_bg_accent_color=”” mask_bg_style=”default” mask_bg_opacity=”100″ mask_bg_transform=”left” mask_bg_blend_mode=”normal” render_logics=”” logics=”” absolute=”off” absolute_devices=”small,medium,large” sticky=”off” sticky_devices=”small-visibility,medium-visibility,large-visibility” sticky_background_color=”” sticky_height=”” sticky_offset=”” sticky_transition_offset=”0″ scroll_offset=”0″ animation_type=”” animation_direction=”left” animation_color=”” animation_speed=”0.3″ animation_delay=”0″ animation_offset=”” filter_hue=”0″ filter_saturation=”100″ filter_brightness=”100″ filter_contrast=”100″ filter_invert=”0″ filter_sepia=”0″ filter_opacity=”100″ filter_blur=”0″ filter_hue_hover=”0″ filter_saturation_hover=”100″ filter_brightness_hover=”100″ filter_contrast_hover=”100″ filter_invert_hover=”0″ filter_sepia_hover=”0″ filter_opacity_hover=”100″ filter_blur_hover=”0″][fusion_builder_row][fusion_builder_column type=”1_1″ layout=”1_1″ spacing=”” center_content=”no” link=”” target=”_self” min_height=”” hide_on_mobile=”small-visibility,medium-visibility,large-visibility” class=”” id=”” hover_type=”none” border_color=”” border_style=”solid” border_position=”all” border_radius=”” box_shadow=”no” dimension_box_shadow=”” box_shadow_blur=”0″ box_shadow_spread=”0″ box_shadow_color=”” box_shadow_style=”” padding_top=”” padding_right=”” padding_bottom=”” padding_left=”” margin_top=”” margin_bottom=”” background_type=”single” gradient_start_color=”” gradient_end_color=”” gradient_start_position=”0″ gradient_end_position=”100″ gradient_type=”linear” radial_direction=”center center” linear_angle=”180″ background_color=”” background_image=”” background_image_id=”” background_position=”left top” background_repeat=”no-repeat” background_blend_mode=”none” animation_type=”” animation_direction=”left” animation_speed=”0.3″ animation_offset=”” filter_type=”regular” filter_hue=”0″ filter_saturation=”100″ filter_brightness=”100″ filter_contrast=”100″ filter_invert=”0″ filter_sepia=”0″ filter_opacity=”100″ filter_blur=”0″ filter_hue_hover=”0″ filter_saturation_hover=”100″ filter_brightness_hover=”100″ filter_contrast_hover=”100″ filter_invert_hover=”0″ filter_sepia_hover=”0″ filter_opacity_hover=”100″ filter_blur_hover=”0″ last=”true” border_sizes_top=”0″ border_sizes_bottom=”0″ border_sizes_left=”0″ border_sizes_right=”0″ first=”true”][fusion_imageframe image_id=”66286|full” aspect_ratio=”” custom_aspect_ratio=”100″ aspect_ratio_position=”” skip_lazy_load=”” lightbox=”no” gallery_id=”” lightbox_image=”” lightbox_image_id=”” alt=”” link=”” linktarget=”_self” hide_on_mobile=”small-visibility,medium-visibility,large-visibility” sticky_display=”normal,sticky” class=”” id=”” max_width=”” sticky_max_width=”” align_medium=”none” align_small=”none” align=”none” mask=”” custom_mask=”” mask_size=”” mask_custom_size=”” mask_position=”” mask_custom_position=”” mask_repeat=”” style_type=”” blur=”” stylecolor=”” hue=”” saturation=”” lightness=”” alpha=”” hover_type=”none” magnify_full_img=”” magnify_duration=”120″ scroll_height=”100″ scroll_speed=”1″ margin_top_medium=”” margin_right_medium=”” margin_bottom_medium=”” margin_left_medium=”” margin_top_small=”” margin_right_small=”” margin_bottom_small=”” margin_left_small=”” margin_top=”” margin_right=”” margin_bottom=”20px” margin_left=”” bordersize=”” bordercolor=”” borderradius=”” z_index=”” caption_style=”off” caption_align_medium=”none” caption_align_small=”none” caption_align=”none” caption_title=”” caption_text=”” caption_title_tag=”2″ fusion_font_family_caption_title_font=”” fusion_font_variant_caption_title_font=”” caption_title_size=”” caption_title_line_height=”” caption_title_letter_spacing=”” caption_title_transform=”” caption_title_color=”” caption_background_color=”” fusion_font_family_caption_text_font=”” fusion_font_variant_caption_text_font=”” caption_text_size=”” caption_text_line_height=”” caption_text_letter_spacing=”” caption_text_transform=”” caption_text_color=”” caption_border_color=”” caption_overlay_color=”” caption_margin_top=”” caption_margin_right=”” caption_margin_bottom=”” caption_margin_left=”” animation_type=”” animation_direction=”left” animation_color=”” animation_speed=”0.3″ animation_delay=”0″ animation_offset=”” filter_hue=”0″ filter_saturation=”100″ filter_brightness=”100″ filter_contrast=”100″ filter_invert=”0″ filter_sepia=”0″ filter_opacity=”100″ filter_blur=”0″ filter_hue_hover=”0″ filter_saturation_hover=”100″ filter_brightness_hover=”100″ filter_contrast_hover=”100″ filter_invert_hover=”0″ filter_sepia_hover=”0″ filter_opacity_hover=”100″ filter_blur_hover=”0″]https://www.jasonfox.me/wp-content/uploads/2024/12/0761ed3b-5de3-4015-8f77-d5d969726d9b.webp[/fusion_imageframe][fusion_title title_type=”text” scroll_reveal_effect=”color_change” scroll_reveal_basis=”chars” scroll_reveal_behavior=”always” scroll_reveal_duration=”500″ scroll_reveal_stagger=”200″ scroll_reveal_delay=”0″ scroll_reveal_above_fold=”yes” marquee_direction=”left” marquee_mask_edges=”no” marquee_speed=”15000″ rotation_effect=”bounceIn” display_time=”1200″ highlight_effect=”circle” loop_animation=”once” highlight_animation_duration=”1500″ highlight_width=”9″ highlight_smudge_effect=”no” highlight_top_margin=”0″ before_text=”” rotation_text=”” highlight_text=”” after_text=”” awb-switch-editor-focus=”” title_link=”off” link_url=”” link_target=”_self” hide_on_mobile=”small-visibility,medium-visibility,large-visibility” sticky_display=”normal,sticky” class=”” id=”” content_align_medium=”” content_align_small=”” content_align=”left” size=”2″ animated_font_size=”” fusion_font_family_title_font=”” fusion_font_variant_title_font=”” font_size=”” line_height=”” letter_spacing=”” text_transform=”” text_color=”” hue=”” saturation=”” lightness=”” alpha=”” animated_text_color=”” highlight_color=”” text_shadow=”no” text_shadow_vertical=”” text_shadow_horizontal=”” text_shadow_blur=”0″ text_shadow_color=”” text_stroke=”no” text_stroke_size=”1″ text_stroke_color=”” text_overflow=”none” margin_top_medium=”” margin_right_medium=”” margin_bottom_medium=”” margin_left_medium=”” margin_top_small=”” margin_right_small=”” margin_bottom_small=”” margin_left_small=”” margin_top=”” margin_right=”” margin_bottom=”30″ margin_left=”” margin_top_mobile=”” margin_bottom_mobile=”” gradient_font=”no” gradient_start_color=”” gradient_end_color=”” gradient_start_position=”0″ gradient_end_position=”100″ gradient_type=”linear” radial_direction=”center center” linear_angle=”180″ style_type=”default” sep_color=”” link_color=”” link_hover_color=”” animation_type=”” animation_direction=”left” animation_color=”” animation_speed=”0.3″ animation_delay=”0″ animation_offset=””]
Final Steps Before You Launch Your Real Estate Website
[/fusion_title][fusion_text columns=”” column_min_width=”” column_spacing=”” rule_style=”” rule_size=”” rule_color=”” hue=”” saturation=”” lightness=”” alpha=”” user_select=”” awb-switch-editor-focus=”” content_alignment_medium=”” content_alignment_small=”” content_alignment=”” hide_on_mobile=”small-visibility,medium-visibility,large-visibility” sticky_display=”normal,sticky” class=”” id=”” width_medium=”” width_small=”” width=”” min_width_medium=”” min_width_small=”” min_width=”” max_width_medium=”” max_width_small=”” max_width=”” margin_top=”” margin_right=”” margin_bottom=”” margin_left=”” fusion_font_family_text_font=”” fusion_font_variant_text_font=”” font_size=”” line_height=”” letter_spacing=”” text_transform=”” text_color=”” animation_type=”” animation_direction=”left” animation_color=”” animation_speed=”0.3″ animation_delay=”0″ animation_offset=”” logics=””]
You’ve made it through the full checklist—nicely done! While not every item will apply to every real estate agent or site, following this guide gives you the best chance at a smooth and successful launch.
Review All Checklists One Last Time
Give each section—Testing, WordPress setup, and Content—a final pass. Fix any small errors, broken links, or overlooked settings before your audience sees them.
Perform a Visual Walkthrough
Click through every page on both desktop and mobile. Make sure everything displays as expected—no broken layouts, missing buttons, or wonky formatting. This is your best chance to catch anything out of place.
Confirm Site Speed and Functionality Post-Launch
Once your site is live, re-run your speed and SEO tools like GTmetrix or Google PageSpeed Insights. Sometimes things behave differently once you push live. Check all CTAs and forms to make sure they’re working properly in real-time.
Celebrate and Start Promoting!
A clean, fast, professional-looking website is a huge step forward in your marketing. Now it’s time to share your new site on social, email your list, and start driving traffic. You’ve earned it.
- Check all the boxes?
- Ready to launch with confidence?
Then it’s go time.
[/fusion_text][/fusion_builder_column][/fusion_builder_row][/fusion_builder_container][fusion_builder_container admin_label=”FAQ” type=”legacy” hundred_percent=”no” hundred_percent_height=”no” min_height_medium=”” min_height_small=”” min_height=”” hundred_percent_height_scroll=”no” align_content=”stretch” flex_align_items=”flex-start” flex_justify_content=”flex-start” flex_wrap_medium=”” flex_wrap_small=”” flex_wrap=”wrap” flex_column_spacing=”” hundred_percent_height_center_content=”yes” equal_height_columns=”no” container_tag=”div” menu_anchor=”faq” hide_on_mobile=”small-visibility,medium-visibility,large-visibility” status=”published” publish_date=”” class=”” id=”” margin_top_medium=”” margin_bottom_medium=”” margin_top_small=”” margin_bottom_small=”” margin_top=”” margin_bottom=”40px” padding_top_medium=”” padding_right_medium=”” padding_bottom_medium=”” padding_left_medium=”” padding_top_small=”” padding_right_small=”” padding_bottom_small=”” padding_left_small=”” padding_top=”60″ padding_right=”30″ padding_bottom=”60″ padding_left=”30″ link_hover_color=”” hue=”” saturation=”” lightness=”” alpha=”” link_color=”” border_sizes_top=”” border_sizes_right=”” border_sizes_bottom=”” border_sizes_left=”” border_color=”” border_style=”solid” border_radius_top_left=”” border_radius_top_right=”” border_radius_bottom_right=”” border_radius_bottom_left=”” box_shadow=”no” box_shadow_vertical=”” box_shadow_horizontal=”” box_shadow_blur=”0″ box_shadow_spread=”0″ box_shadow_color=”” box_shadow_style=”” z_index=”” overflow=”” background_color_medium=”” background_color_small=”” background_color=”” gradient_start_color=”” gradient_end_color=”” gradient_start_position=”0″ gradient_end_position=”100″ gradient_type=”linear” radial_direction=”center center” linear_angle=”180″ background_image_medium=”” background_image_small=”” background_image=”” skip_lazy_load=”” background_position_medium=”” background_position_small=”” background_position=”center center” background_repeat_medium=”” background_repeat_small=”” background_repeat=”no-repeat” background_size_medium=”” background_size_small=”” background_size=”” background_custom_size=”” background_custom_size_medium=”” background_custom_size_small=”” fade=”no” background_parallax=”none” enable_mobile=”no” parallax_speed=”0.3″ background_blend_mode_medium=”” background_blend_mode_small=”” background_blend_mode=”none” background_slider_images=”” background_slider_position=”” background_slider_skip_lazy_loading=”no” background_slider_loop=”yes” background_slider_pause_on_hover=”no” background_slider_slideshow_speed=”5000″ background_slider_animation=”fade” background_slider_direction=”up” background_slider_animation_speed=”800″ background_slider_blend_mode=”” video_mp4=”” video_webm=”” video_ogv=”” video_url=”” video_aspect_ratio=”16:9″ video_loop=”yes” video_mute=”yes” video_preview_image=”” pattern_bg=”none” pattern_custom_bg=”” pattern_bg_color=”” pattern_bg_style=”default” pattern_bg_opacity=”100″ pattern_bg_size=”” pattern_bg_blend_mode=”normal” mask_bg=”none” mask_custom_bg=”” mask_bg_color=”” mask_bg_accent_color=”” mask_bg_style=”default” mask_bg_opacity=”100″ mask_bg_transform=”left” mask_bg_blend_mode=”normal” render_logics=”” logics=”” absolute=”off” absolute_devices=”small,medium,large” sticky=”off” sticky_devices=”small-visibility,medium-visibility,large-visibility” sticky_background_color=”” sticky_height=”” sticky_offset=”” sticky_transition_offset=”0″ scroll_offset=”0″ animation_type=”” animation_direction=”left” animation_color=”” animation_speed=”0.3″ animation_delay=”0″ animation_offset=”” filter_hue=”0″ filter_saturation=”100″ filter_brightness=”100″ filter_contrast=”100″ filter_invert=”0″ filter_sepia=”0″ filter_opacity=”100″ filter_blur=”0″ filter_hue_hover=”0″ filter_saturation_hover=”100″ filter_brightness_hover=”100″ filter_contrast_hover=”100″ filter_invert_hover=”0″ filter_sepia_hover=”0″ filter_opacity_hover=”100″ filter_blur_hover=”0″][fusion_builder_row][fusion_builder_column type=”1_1″ layout=”1_1″ spacing=”” center_content=”no” link=”” target=”_self” min_height=”” hide_on_mobile=”small-visibility,medium-visibility,large-visibility” class=”” id=”” hover_type=”none” border_color=”” border_style=”solid” border_position=”all” border_radius=”” box_shadow=”no” dimension_box_shadow=”” box_shadow_blur=”0″ box_shadow_spread=”0″ box_shadow_color=”” box_shadow_style=”” padding_top=”” padding_right=”” padding_bottom=”” padding_left=”” margin_top=”” margin_bottom=”” background_type=”single” gradient_start_color=”” gradient_end_color=”” gradient_start_position=”0″ gradient_end_position=”100″ gradient_type=”linear” radial_direction=”center center” linear_angle=”180″ background_color=”” background_image=”” background_image_id=”” background_position=”left top” background_repeat=”no-repeat” background_blend_mode=”none” animation_type=”” animation_direction=”left” animation_speed=”0.3″ animation_offset=”” filter_type=”regular” filter_hue=”0″ filter_saturation=”100″ filter_brightness=”100″ filter_contrast=”100″ filter_invert=”0″ filter_sepia=”0″ filter_opacity=”100″ filter_blur=”0″ filter_hue_hover=”0″ filter_saturation_hover=”100″ filter_brightness_hover=”100″ filter_contrast_hover=”100″ filter_invert_hover=”0″ filter_sepia_hover=”0″ filter_opacity_hover=”100″ filter_blur_hover=”0″ last=”true” border_sizes_top=”0″ border_sizes_bottom=”0″ border_sizes_left=”0″ border_sizes_right=”0″ first=”true”][fusion_title title_type=”text” scroll_reveal_effect=”color_change” scroll_reveal_basis=”chars” scroll_reveal_behavior=”always” scroll_reveal_duration=”500″ scroll_reveal_stagger=”200″ scroll_reveal_delay=”0″ scroll_reveal_above_fold=”yes” marquee_direction=”left” marquee_mask_edges=”no” marquee_speed=”15000″ rotation_effect=”bounceIn” display_time=”1200″ highlight_effect=”circle” loop_animation=”once” highlight_animation_duration=”1500″ highlight_width=”9″ highlight_smudge_effect=”no” highlight_top_margin=”0″ before_text=”” rotation_text=”” highlight_text=”” after_text=”” awb-switch-editor-focus=”” title_link=”off” link_url=”” link_target=”_self” hide_on_mobile=”small-visibility,medium-visibility,large-visibility” sticky_display=”normal,sticky” class=”” id=”” content_align_medium=”” content_align_small=”” content_align=”left” size=”2″ animated_font_size=”” fusion_font_family_title_font=”” fusion_font_variant_title_font=”” font_size=”” line_height=”” letter_spacing=”” text_transform=”” text_color=”” hue=”” saturation=”” lightness=”” alpha=”” animated_text_color=”” highlight_color=”” text_shadow=”no” text_shadow_vertical=”” text_shadow_horizontal=”” text_shadow_blur=”0″ text_shadow_color=”” text_stroke=”no” text_stroke_size=”1″ text_stroke_color=”” text_overflow=”none” margin_top_medium=”” margin_right_medium=”” margin_bottom_medium=”” margin_left_medium=”” margin_top_small=”” margin_right_small=”” margin_bottom_small=”” margin_left_small=”” margin_top=”” margin_right=”” margin_bottom=”30px” margin_left=”” margin_top_mobile=”” margin_bottom_mobile=”” gradient_font=”no” gradient_start_color=”” gradient_end_color=”” gradient_start_position=”0″ gradient_end_position=”100″ gradient_type=”linear” radial_direction=”center center” linear_angle=”180″ style_type=”default” sep_color=”” link_color=”” link_hover_color=”” animation_type=”” animation_direction=”left” animation_color=”” animation_speed=”0.3″ animation_delay=”0″ animation_offset=””]
Frequently Asked Questions
[/fusion_title][fusion_text columns=”” column_min_width=”” column_spacing=”” rule_style=”” rule_size=”” rule_color=”” hue=”” saturation=”” lightness=”” alpha=”” user_select=”” awb-switch-editor-focus=”” content_alignment_medium=”” content_alignment_small=”” content_alignment=”” hide_on_mobile=”small-visibility,medium-visibility,large-visibility” sticky_display=”normal,sticky” class=”” id=”” width_medium=”” width_small=”” width=”” min_width_medium=”” min_width_small=”” min_width=”” max_width_medium=”” max_width_small=”” max_width=”” margin_top=”” margin_right=”” margin_bottom=”” margin_left=”” fusion_font_family_text_font=”” fusion_font_variant_text_font=”” font_size=”” line_height=”” letter_spacing=”” text_transform=”” text_color=”” animation_type=”” animation_direction=”left” animation_color=”” animation_speed=”0.3″ animation_delay=”0″ animation_offset=”” logics=””]
What is the best image format for real estate websites?
Use WebP whenever possible. It offers the smallest file size without losing quality and loads faster than JPG or PNG. For logos, use SVG if supported.
Do I need a custom 404 page before launching my site?
Yes. A custom 404 page helps retain visitors who land on a broken or outdated URL. It keeps users engaged by redirecting them back into your content rather than losing them completely.
How can I make sure my site is mobile-friendly before launch?
Use tools like Google Mobile-Friendly Test or the mobile view in Chrome DevTools to see how your site looks on different screen sizes. Also, test forms and menus manually on a phone.
Is Yoast SEO enough for launching a real estate site?
Yoast covers the basics, like meta titles and descriptions. But for competitive markets, you may want to pair it with AI-based tools like Clearscope or MarketMuse to fully optimize content.
What’s the difference between caching and a CDN?
Caching stores parts of your site locally on the visitor’s browser or server to load faster. A CDN (Content Delivery Network) delivers your site’s assets (like images and scripts) from servers around the world to reduce load time based on user location.
[/fusion_text][/fusion_builder_column][/fusion_builder_row][/fusion_builder_container]
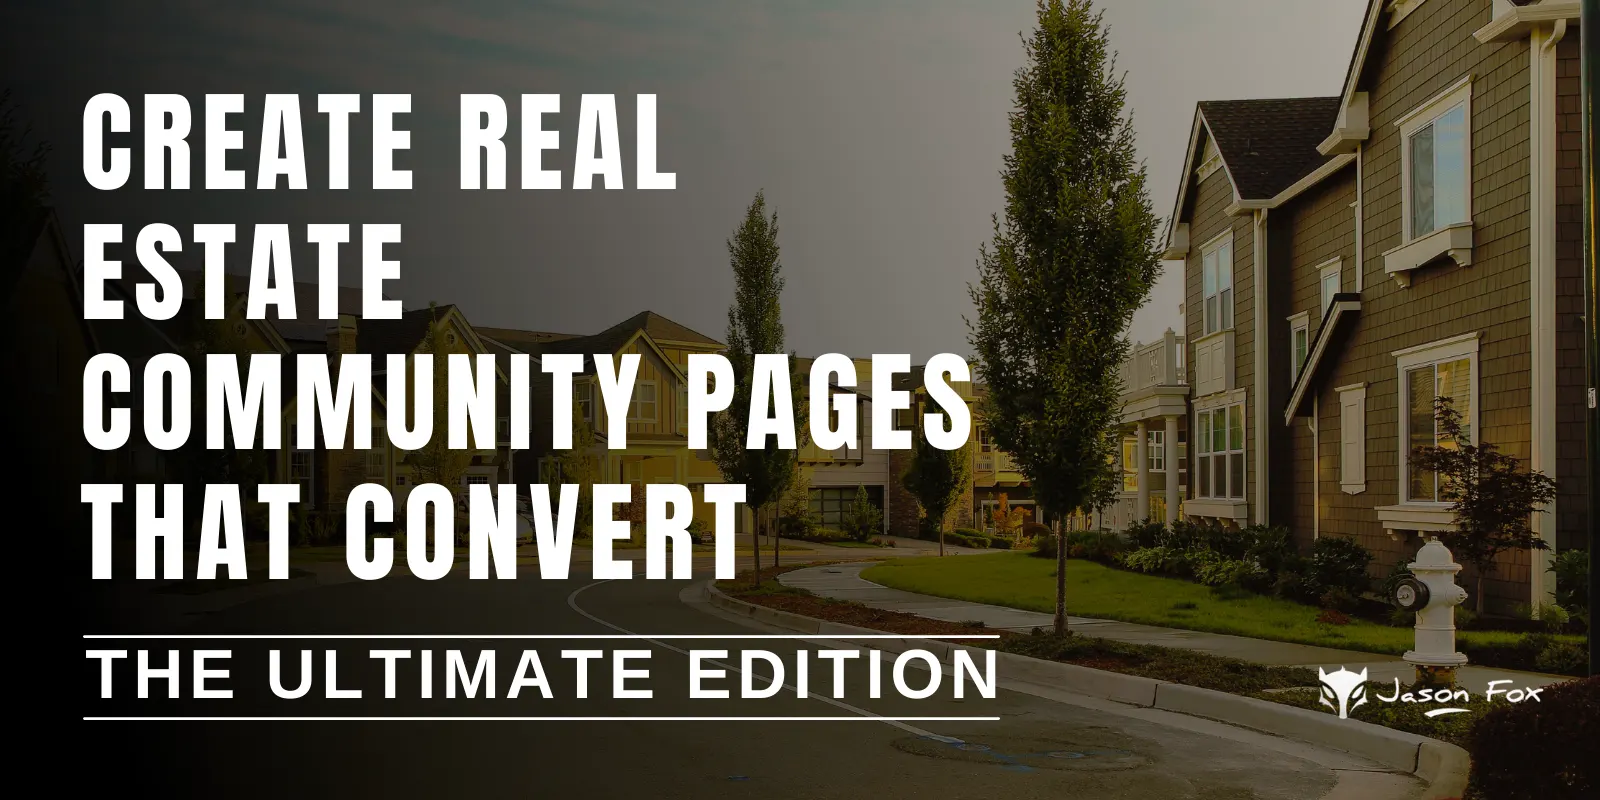


Great information. Thanks!
Very Good information
Thanks for sharing the useful information
Looks as if your spell check tool missed something..
If you are affiliated with a broker make sure “aby” broker specific references are in place. ABY or ANY?
Thanks for the heads up.
Putting all of my creative and entrepreneurial energy into real estate investing has allowed me to open doors for my family and myself, and it has altered my life.
This checklist is a lifesaver—testing, WordPress setup, and content all in one place makes launching a real estate site feel manageable.”
“I appreciate how each stage is broken down. It’s easy to overlook content polish when you’re excited to go live, and this is a great reminder